
Overview
Trials allow customers to try out your services before committing to a membership. Because of this it’s important to set up your trials similarly to the programs you offer.
Permissions and Accessibility
Staff Access:
- Admin
- Full Access
- Manager
- Has access to view trial setup
- Does not have access to edit
- Staff
- No access
MyStudio Plan Restrictions:
- None
Specifications
Setup
Begin trial creation by going to services and products > trials and selecting “Add new trial option.” You will then have a choice to start the creation process from scratch or work from a template. You will then need to go through the following steps of creation:
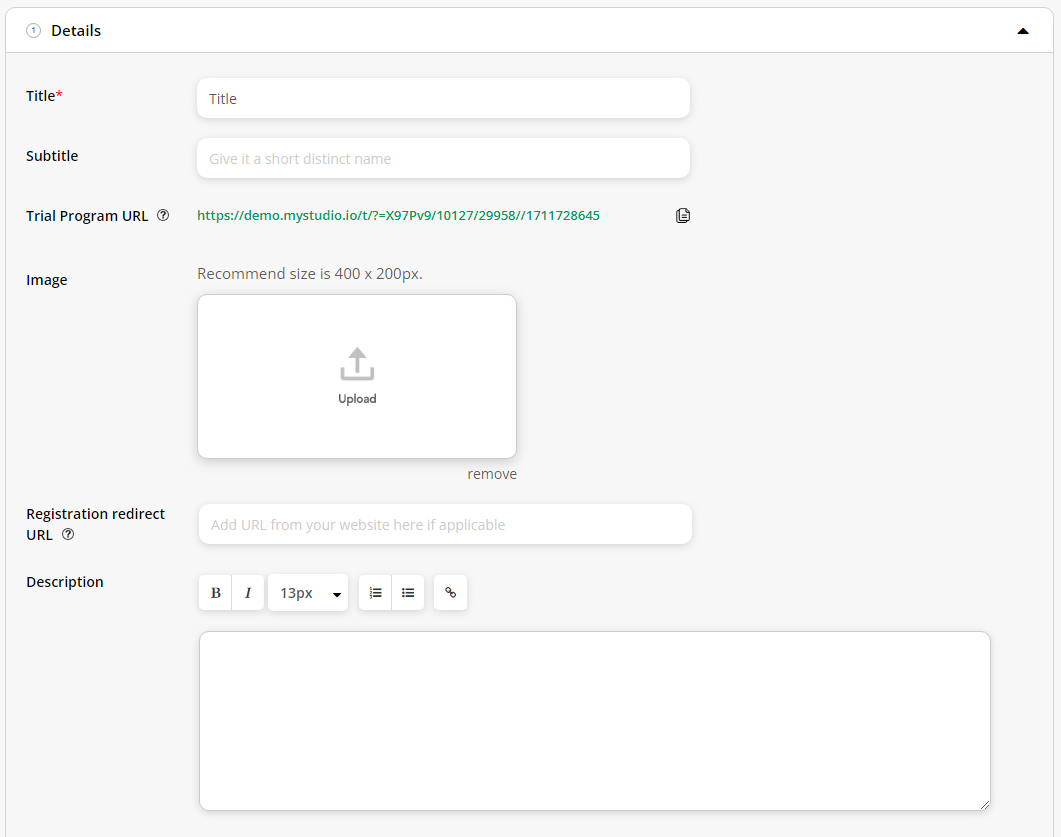
- Title: enter the title of your trial. This field is mandatory.
- Subtitle: can provide further information such as age-range.
- Image: if nothing is entered, the default image from MyStudio will be placed.
- Registration redirect URL: this will redirect members to the URL after a successful trial registration.
- Description
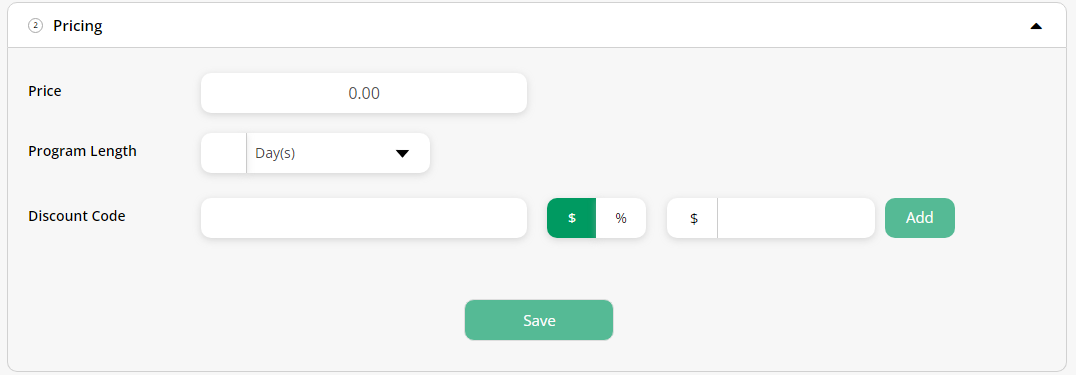
- Price: enter if applicable.
- Program length: the amount of days or weeks the trial is active. Attendance for classes is based on program length. For example, if there are 7 days allowed for the trial, then 7 attendances are allowed.
- Discount Code: enter if you want a discount code option for the trial amount.
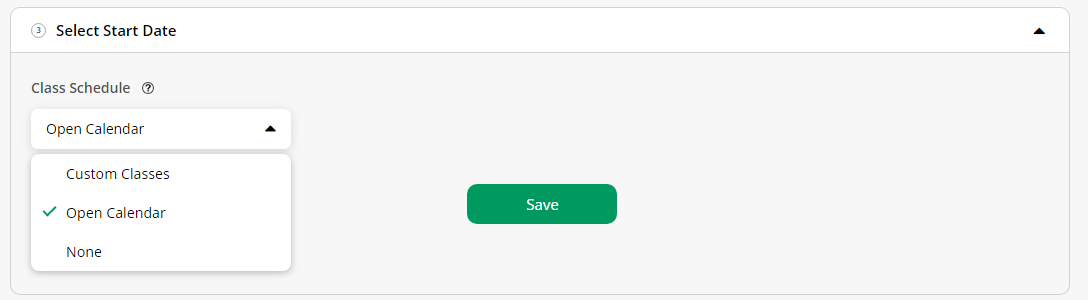
- Custom Classes: choose which classes from services and products > classes and appointments connect directly to the trial. When customers register for this trial, they will simultaneously choose a class time to attend. This class time will become the start date for the trial. A trial must be published before you can setup this setting.
- Open Calendar: when a customer registers for the trial, they will select a specific start date the trial will begin.
- None: when a customer registers for the trial, the day they register will be the start date.
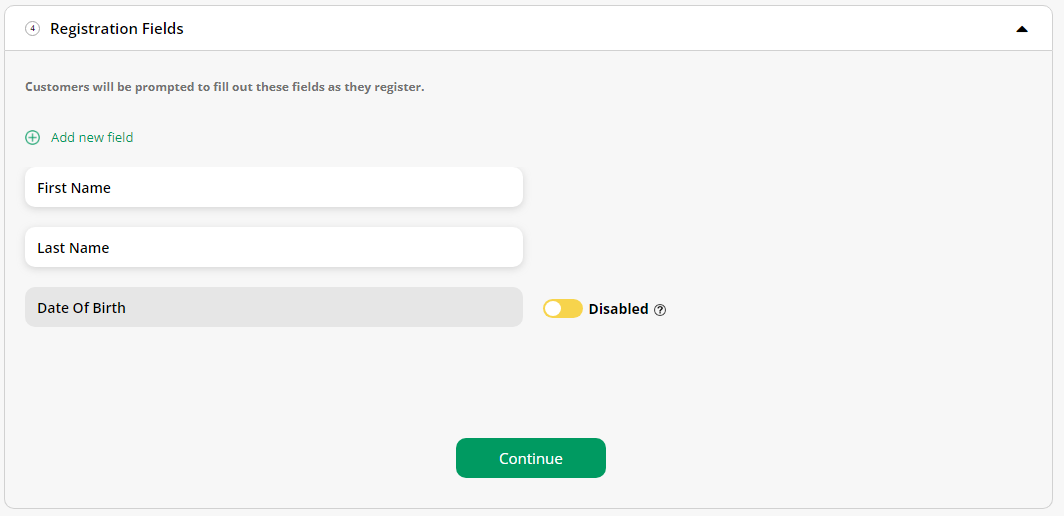
- Add new field: add any custom registration fields that the customer will have to answer at registration if marked as mandatory.
- Enable or disable date of birth
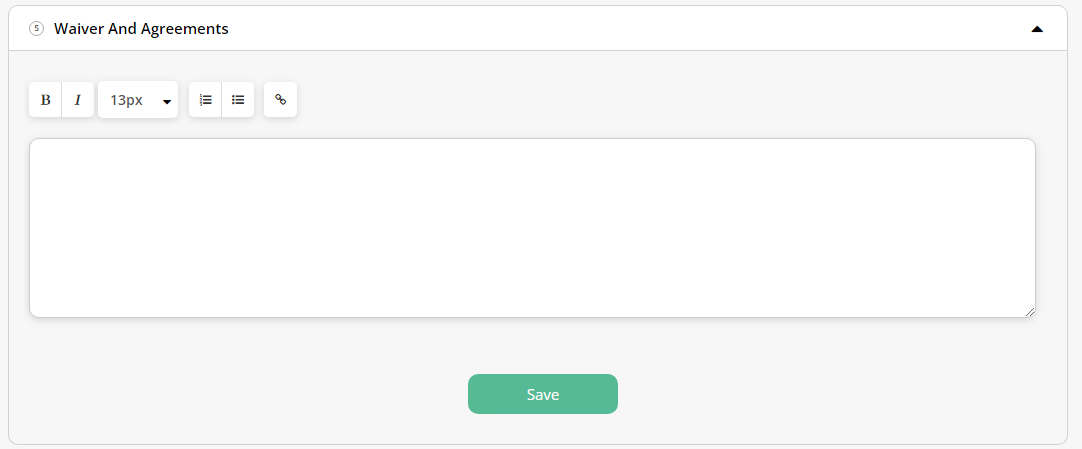
- Enter waiver and agreements that customers will sign for at registration
Manage and Settings
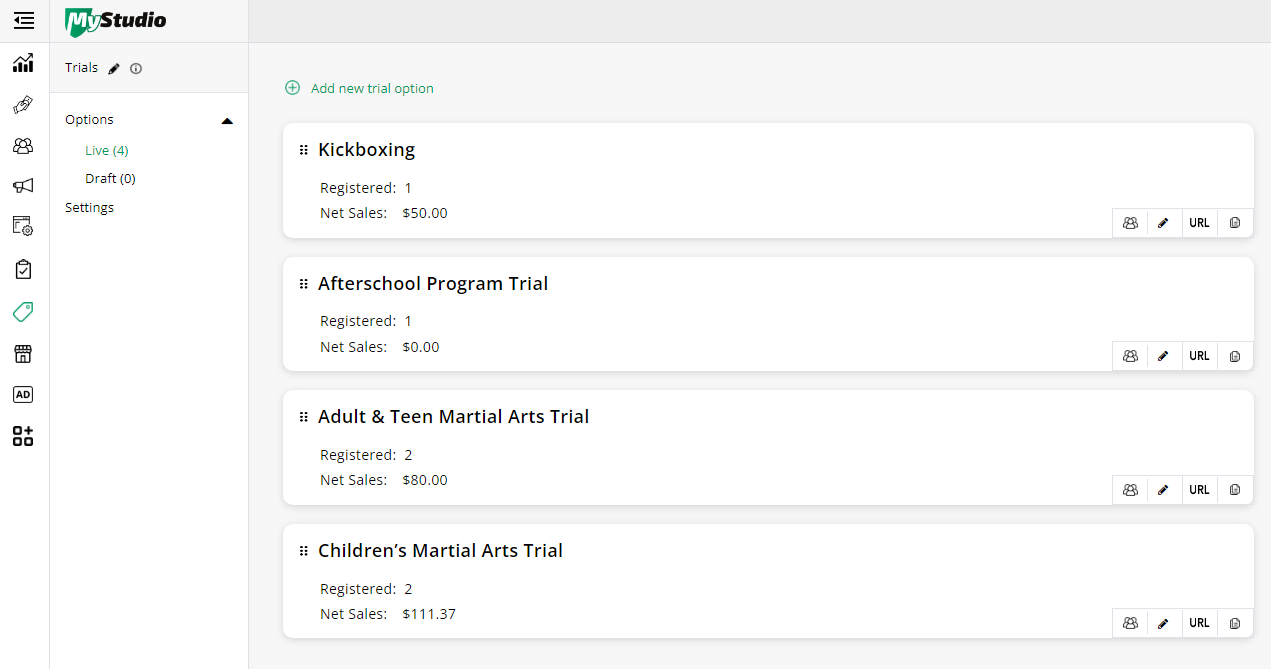
Live
Trials that have been published will appear in the “Live” list. From this section, you can do the following actions:
- Dots next to title: hold and drag the dots next to the title in order to rearrange the trials in the order of preference.
- Manage Participants (people icon): this will redirect you to All Customers > Trial participants to perform any actions from that section
- Edit (pencil icon): this will allow admin or studio owner access to edit the trial setup, delete the trial if there have not been registrations, or unpublish the trial.
- URL: copy the URL of the specific trial to send to customers
- Duplicate (paper icon): This will create a copy of the trial setup in drafts that you can edit from.
You will also see the amount of total registrations and net sales that have occurred for each trial.
Draft
Trials that have been started but not published, or have been unpublished, will appear in the “Draft” list. From this section you can do the following actions:
- Manage Participants (people icon): this will redirect you to All Customers > Trial participants to perform any actions from that section. This is really only applicable if the trial was published at some point prior.
- Edit (pencil icon): this will allow admin or studio owner access to edit the trial setup, delete the trial if there have not been registrations, or unpublish the trial.
- Duplicate (paper icon): This will create a copy of the trial setup in drafts that you can edit from.
You will also see the amount of total registrations and net sales that have occurred for each trial if they had been published at some point prior.
Settings
The settings section will present you with general settings that encompass all trials.

- On/Off: if this is set to “on,” then customers can register for trials. If this is “off,” then no one can register for trials, even from the staff POS.
- Trials URL: this is the general URL for trials you can send to customers. This will show all published trial listings.
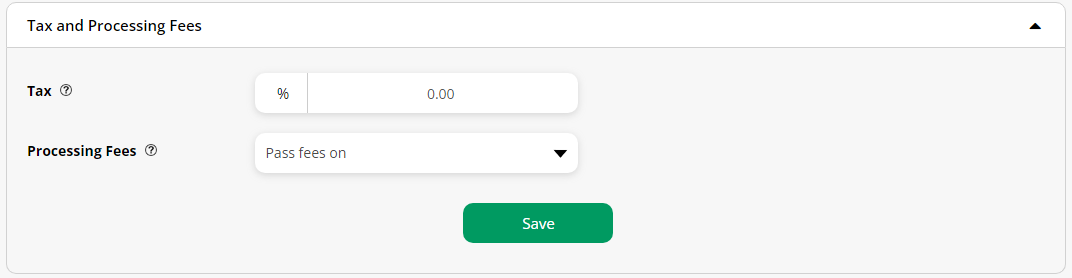
- Tax: enter the tax percentage if applicable
- Processing fees: “Pass fees on” will charge the CC or ACH processing fee associated with your MyStudio plan to the customer. “Absorb” will mean you are responsible for the CC and ACH processing fee associated with your MyStudio plan.
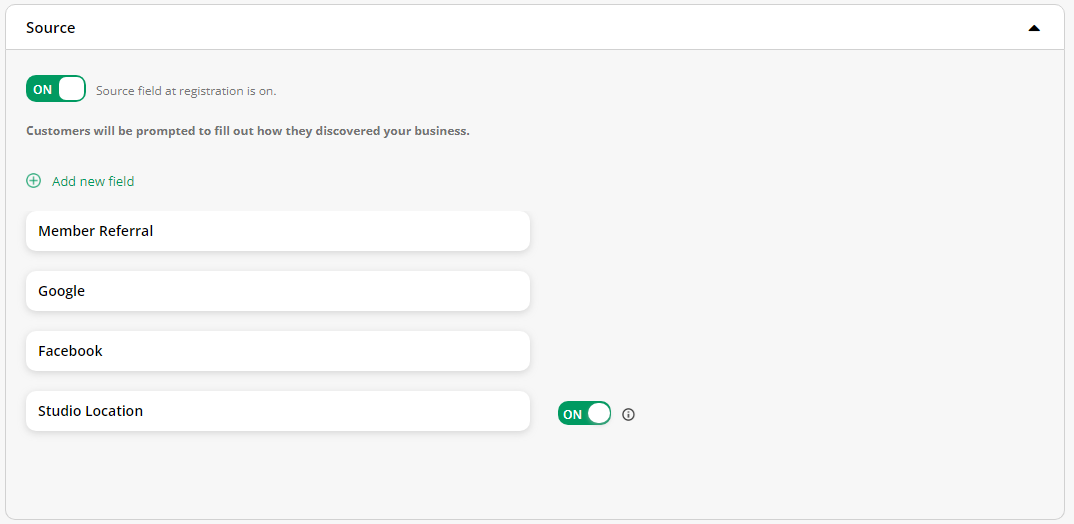
- On/Off: determines whether this information is required during registration. If “on” customers will have to state how they discovered your business.
- Add new field: you can add custom sources for how they discovered you, such as from an event.
- Turn studio location on/off: enables or disables the “studio location” as a viable source option.
Google Ad and Facebook Ad, if you have integrated these accounts with MyStudio, will be captured as a source automatically, even if “source” is turned off.
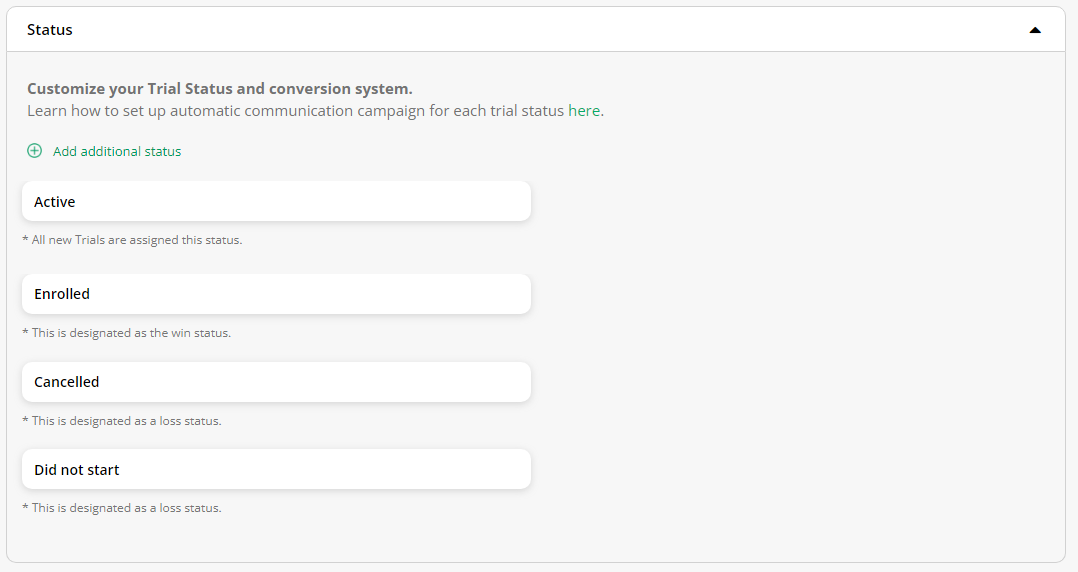
- Status
- Add additional status: add custom statuses. Please note that custom statuses will still count as having an active trial.
- “Active” status means the customer is actively in a trial and has not enrolled for a program or stated they aren’t interested.
- “Enrolled” status means the customer has enrolled into a program.
- “Canceled” status means the customer has tried out your services and is not interested.
- “Did not start” status means the customer signed up for a trial but never utilized it.
These statuses are shown in your trial analytics and conversion table and can be used for specific campaign setups.
NOTE: Status updates must be done manually. For example, if a trial member registers for a program, you’ll need to manually change their status to “Enrolled.” Bulk updates are not supported.
However, you can set up an automation that will automatically update a trial member’s status to “Enrolled” if their phone number or email matches an active membership.
Learn how to set this up here: Trial Status Conversion Automation