---
title: [V1] Amplify
description: Learn how to set up and use Amplify, MyStudio’s AI chatbot, to convert leads into paying members via SMS. Step-by-step guide for setup, OpenAI integration, and chatbot agent creation.
---
[Skip to content](https://help.mystudio.io/v1-amplify#main-content)
English
Show submenu for translations
[](https://help.mystudio.io/?hsLang=en)
Open main navigation
Close main navigation
- English
Show submenu for translations
- [Go to mystudio.io](https://www.mystudio.io/)
[Go to mystudio.io](https://www.mystudio.io/)
Hello. How can we help you?
- There are no suggestions because the search field is empty.
1. [Help Center](https://help.mystudio.io/?hsLang=en)
2. [Amplify](https://help.mystudio.io/amplify?hsLang=en)
# \[V1\] Amplify
## Convert your leads to paying customers through Amplify-our AI chatbot. This AI interacts with your leads at any time of day, increasing your conversion rate and giving you more time to focus on other things.
###### *Updated: November 17, 2025*
### **Overview**
Amplify is an AI chatbot that allows you to convert prospective leads into paying members through SMS while also saving you time and increasing customer satisfaction. Amplify agents can make sales 24/7 and even answer questions based on your knowledge bases.
---
### Table of contents
- [Permissions and accessibility](https://help.mystudio.io/v1-amplify#permissions)
- [Amplify plans](https://help.mystudio.io/v1-amplify#Amplify-plans)
- [Setup](https://help.mystudio.io/v1-amplify#Setup)
- [Step 1: Create OpenAI account](https://help.mystudio.io/v1-amplify#Step1)
- [(NEW) Step 2: Verify OpenAI account](https://help.mystudio.io/v1-amplify#Step2-verify-openai-account)
- [Step 3: Create a Secret API Key](https://help.mystudio.io/v1-amplify#Step3-Create-secret-api-key)
- [Step 4: Add funds to OpenAI](https://help.mystudio.io/v1-amplify#Step4-add-funds)
- [Step 5: Fill out your Knowledge Base](https://help.mystudio.io/v1-amplify#Step5-fill-out-your-knowledge-base)
- [Step 6: Create an Agent](https://help.mystudio.io/v1-amplify#Step6-create-agent)
- [Step 7: Test your agent](https://help.mystudio.io/v1-amplify#Step7-test-your-agent)
- [Step 8: Launch your agent](https://help.mystudio.io/v1-amplify#Step8-launch-agent)
- [Was this article helpful?](https://help.mystudio.io/v1-amplify#Was-this-article-helpful)
---
### Permissions and accessibility
#### Staff Access:
- **Admin:** Full Access
- **Manager:** Full Access
- **Staff:** No access
#### MyStudio Plan Restrictions:
- Amplify is an add-on to your MyStudio plan and comes in two plans (more information below)
- You must have the communication enhancement add-on and a connected or legacy Twilio number. Click here to learn more: Twilio Integration: [Add MyStudio Communication Enhancement Add-on and Create New Twilio Account.](https://help.mystudio.io/twilio-integration-add-mystudio-communication-enhancement-add-on-and-create-new-twilio-account?hsLang=en)
- You must get an OpenAI account (more information below)
[^ Back to top](https://help.mystudio.io/v1-amplify#TABLE)
---
### Amplify Plans
While you can test Amplify to see how it would interact with customers without the add-on, you will have to get the MyStudio Amplify Add-on in order to fully utilize the product. There are two plans available:
**Amplify**
- Allows one agent
- Allows one knowledge base
- Can sell trials
**Amplify Plus**
- Allows 10 agents
- Allows 10 knowledge bases
- Can sell trials, events, and memberships (events and memberships coming soon)
[^ Back to top](https://help.mystudio.io/v1-amplify#TABLE)
---
### Setup
#### Step 1: Create OpenAI account
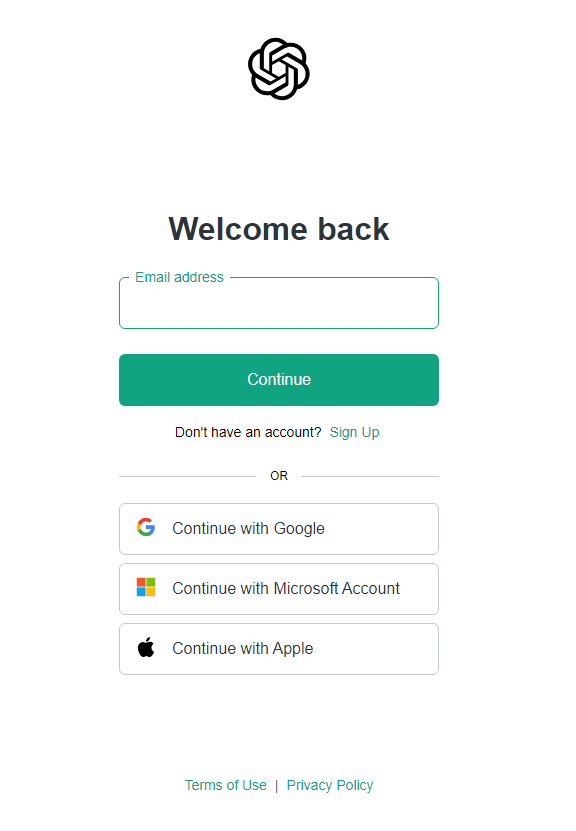
You can create or login to an existing OpenAI account here:[Create an OpenAI Account](https://auth.openai.com/create-account) (skip this step if you have one).
[^ Back to top](https://help.mystudio.io/v1-amplify#TABLE)
---
#### (NEW) Step 2: Verify OpenAI account
**Effective December 17, 2025, Amplify has upgraded to ChatGPT-5.**
This upgrade improves Amplify’s reasoning, response quality, and conversational flow, allowing agents to answer questions more accurately and convert leads more effectively.
To use ChatGPT-5, **OpenAI now requires account verification**. If your OpenAI account is not verified, Amplify may fail to respond or appear to load indefinitely.
To verify your OpenAI account:
a) Go to the [OpenAI "organization settings](https://platform.openai.com/settings/organization/general)" page.
b) Locate the "Verifications" section and click "Verify Organization."
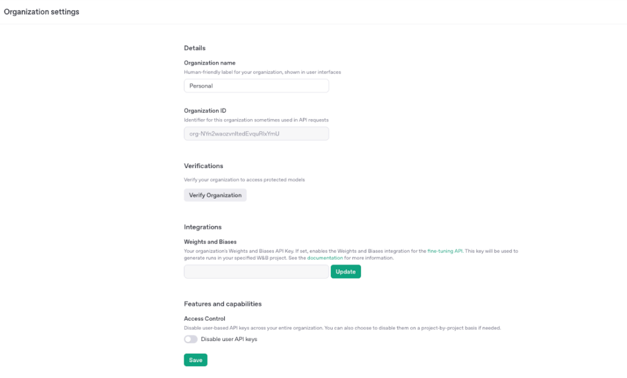
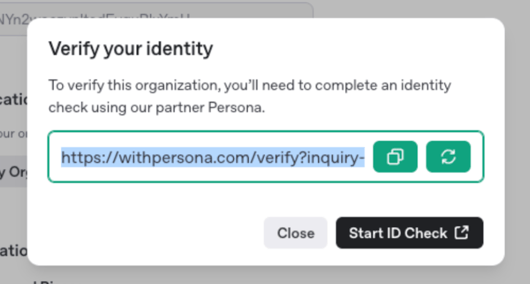
c) When prompted, click "Start ID check". It will take you to a new screen.
d) Click "Begin verifying"
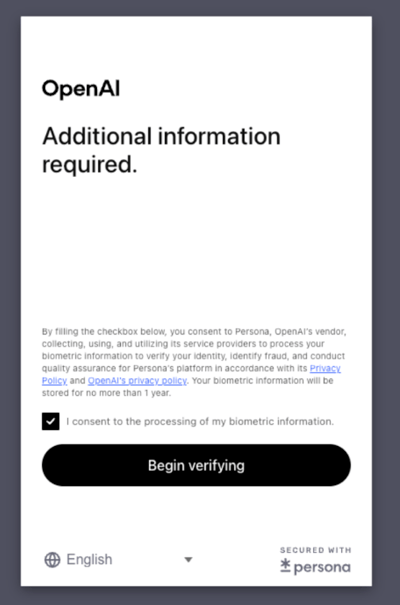
e) Continue on your mobile device by scanning the QR code or sending the verification link to your email.
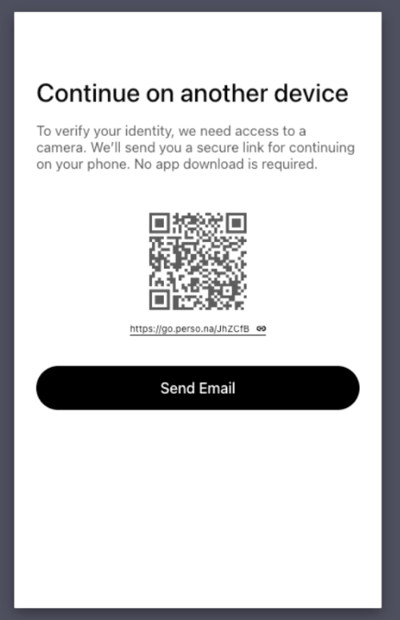
f) You will be prompted to submit your valid government-issued ID through the secure third-party verification services.
g) Follow instructions to take a few photos of yourself to complete verification.
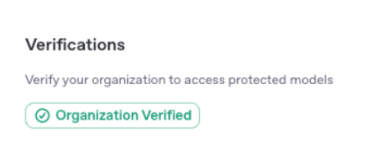
h) Once complete, return to ["organization settings"](https://platform.openai.com/settings/organization/general) and refresh the page. You should see "Organization Verified" in green text displayed under the verification section.
[^ Back to top](https://help.mystudio.io/v1-amplify#TABLE)
---
#### Step 3: Create a Secret API Key
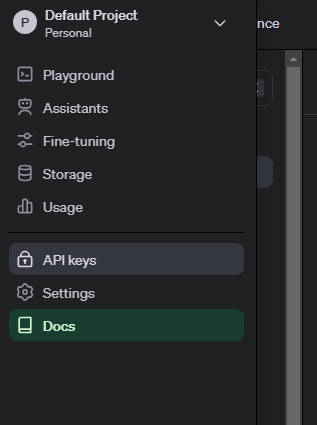
a) While still in the [OpenAI API settings](https://platform.openai.com/settings/organization/general), click the “API keys” section on the left.
b) Click “create new secret key.”
c) Name the key and select a project (default is fine).
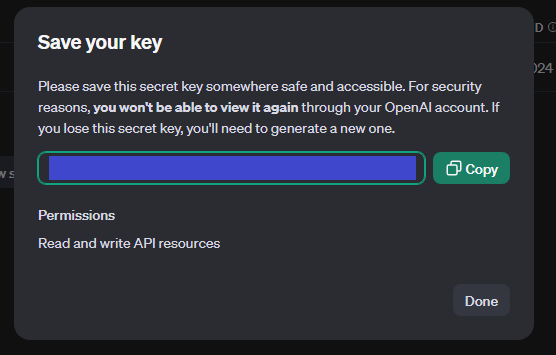
d) Allow all permissions and complete the key creation.
e) Copy the key immediately.
d) In MyStudio, go to Amplify \> Settings \> “Connect OpenAI” and paste the key.
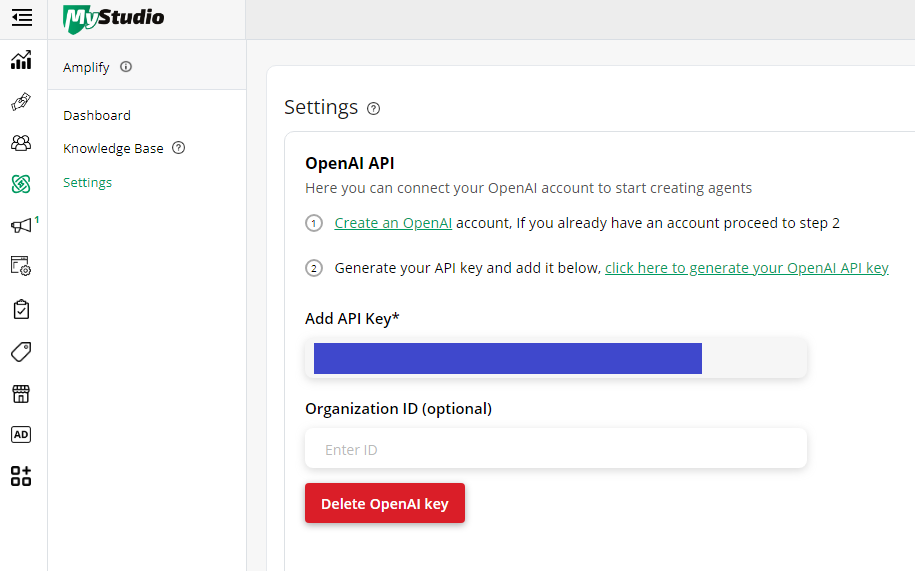
**Tip:** If managing multiple locations with one OpenAI account, generate a unique key per location to track usage.
[^ Back to top](https://help.mystudio.io/v1-amplify#TABLE)
---
#### Step 4: Add Funds to OpenAI
a) In the [OpenAI API platform](https://platform.openai.com/docs/overview), click the gear setting at the top right.
b) On the left, click the billing section.
c) Click “add payment details.”
d) Enter payment details.
e) Add a **minimum of $50** in funds
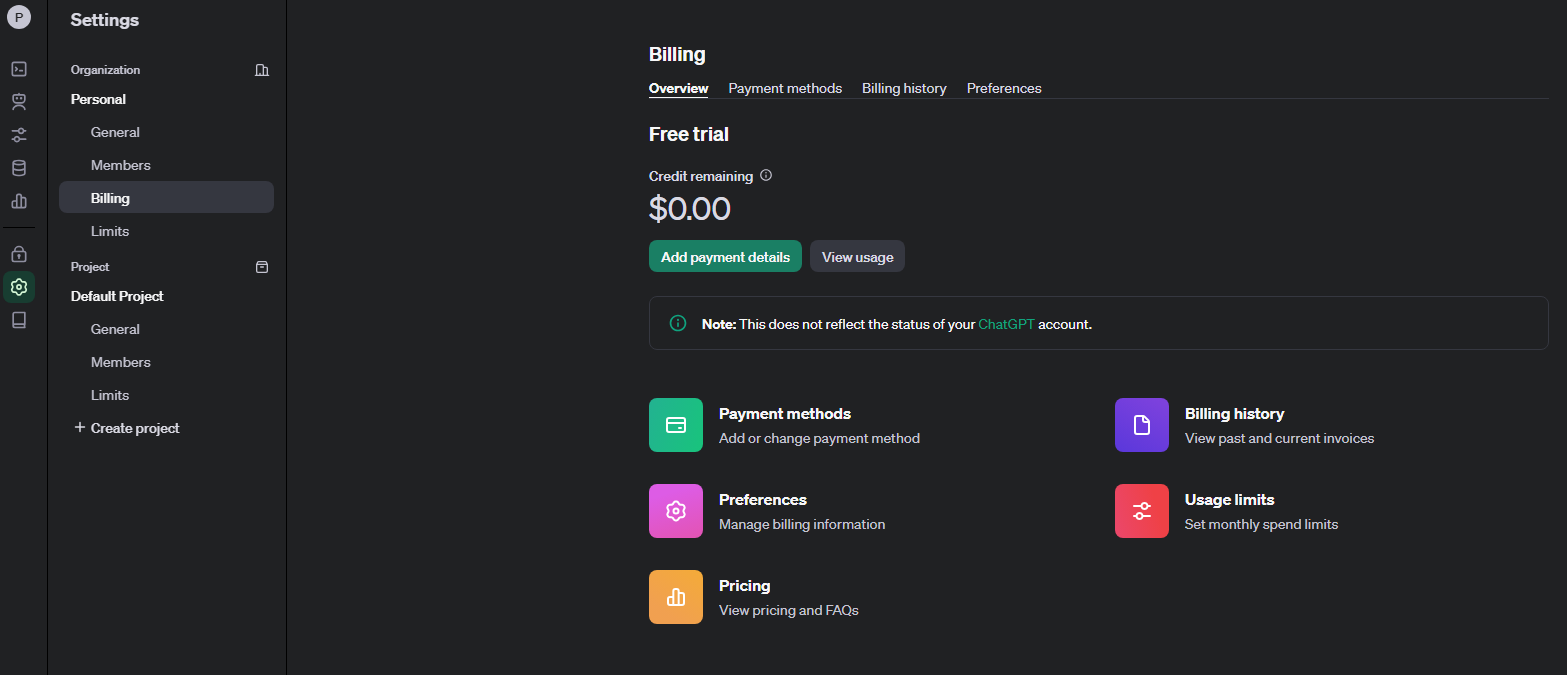
**Important:** Amplify will fail to engage with leads if your OpenAI account lacks sufficient funds or available credits.
Maintaining an active balance is critical to avoiding service interruptions that result in missed conversions and registration link failures.
[^ Back to top](https://help.mystudio.io/v1-amplify#TABLE)
---
#### Step 5: Fill out your Knowledge Base
In MyStudio, you will need to create a knowledge base. While the system will auto-grab information you provided in services and products for the connected trials, a knowledge base is great for answering other frequently asked questions about your business or other important information. To fill out the knowledge base, go to Amplify \> knowledge base \> add new.
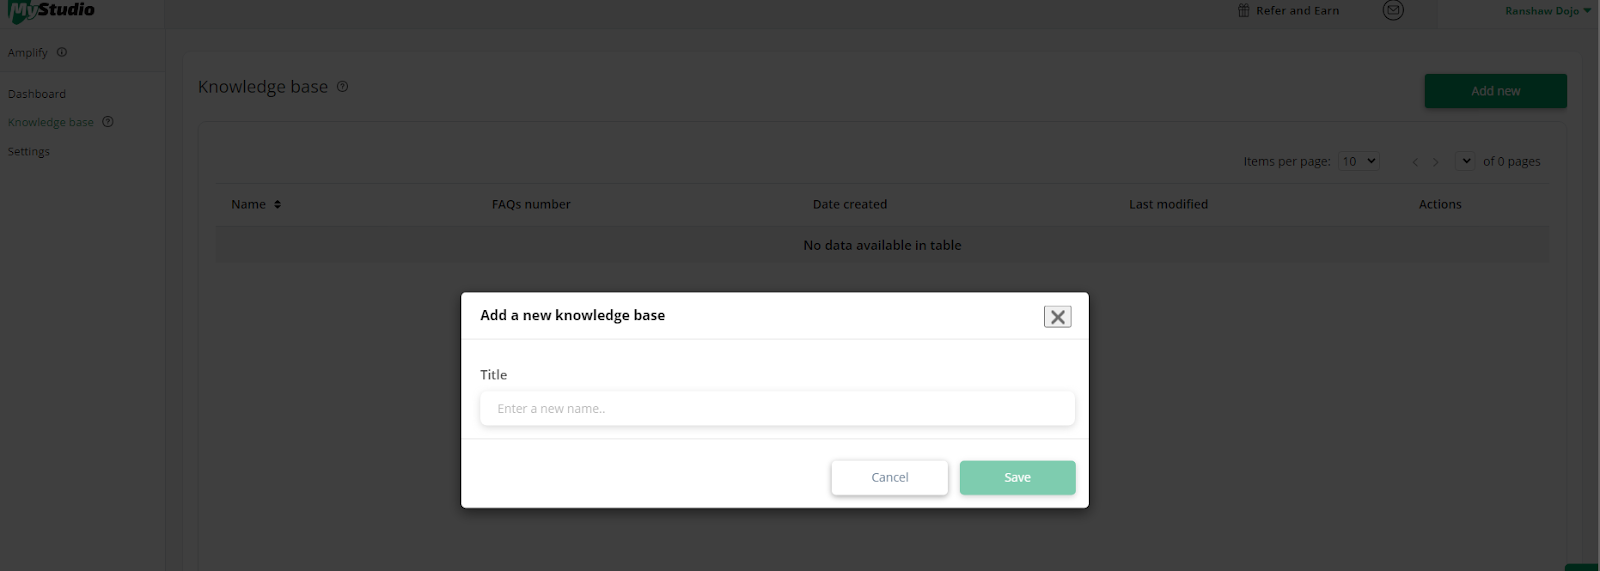
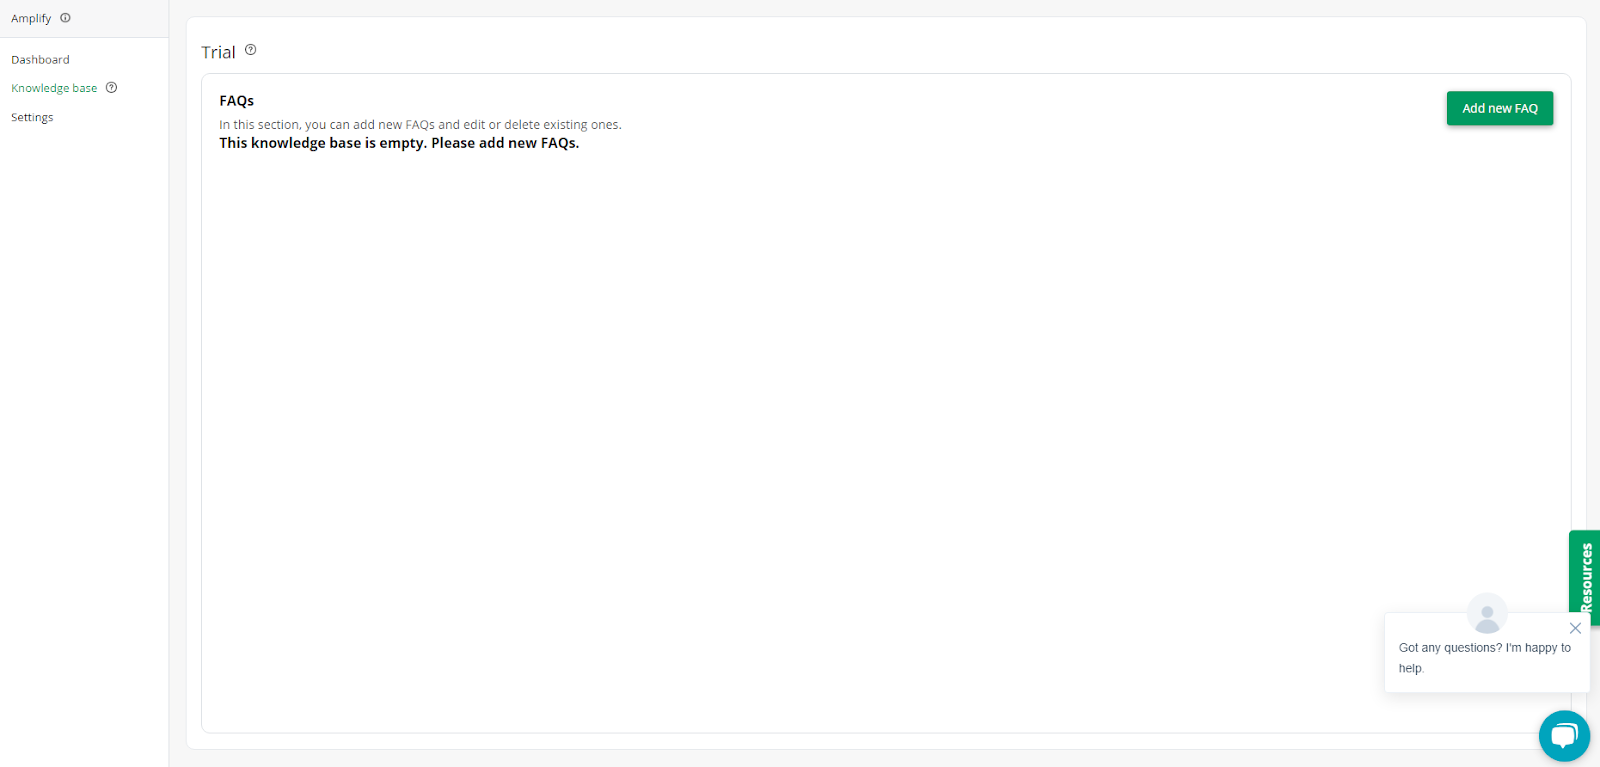
Give the knowledge base a title, then click “Add new FAQ” to enter a new question and answer. You do not have to have this filled out, but you do have to have the knowledge base option to connect to an agent.
#### Highly suggested knowledge base questions
To ensure Amplify always provides the correct contact information, you should add the following three questions to your knowledge base:
1. What is your studio address?
2. What is your studio phone number?
3. What is your studio email address?
Amplify relies on these questions to answer customer inquiries correctly.
#### Multiple locations
If you use one MyStudio account for multiple locations, you need to add separate questions for each location, clearly specifying:
- The full address for each location
- The phone number for each location
- The studio email address for each location.
Examples:
- *"What is the address of the Downtown location?*
- *What is the phone number for the North Studio?*
- *What is the email address for the East Side location?*
Each location needs to be listed as its own set of questions so Amplify can respond accurately based on the customer's inquiry.
You do not need a large knowledge base to get started, but these contact questions are highly suggested before connecting a knowledge base to an agent.
[^ Back to top](https://help.mystudio.io/v1-amplify#TABLE)
---
#### Step 6: Create an Agent
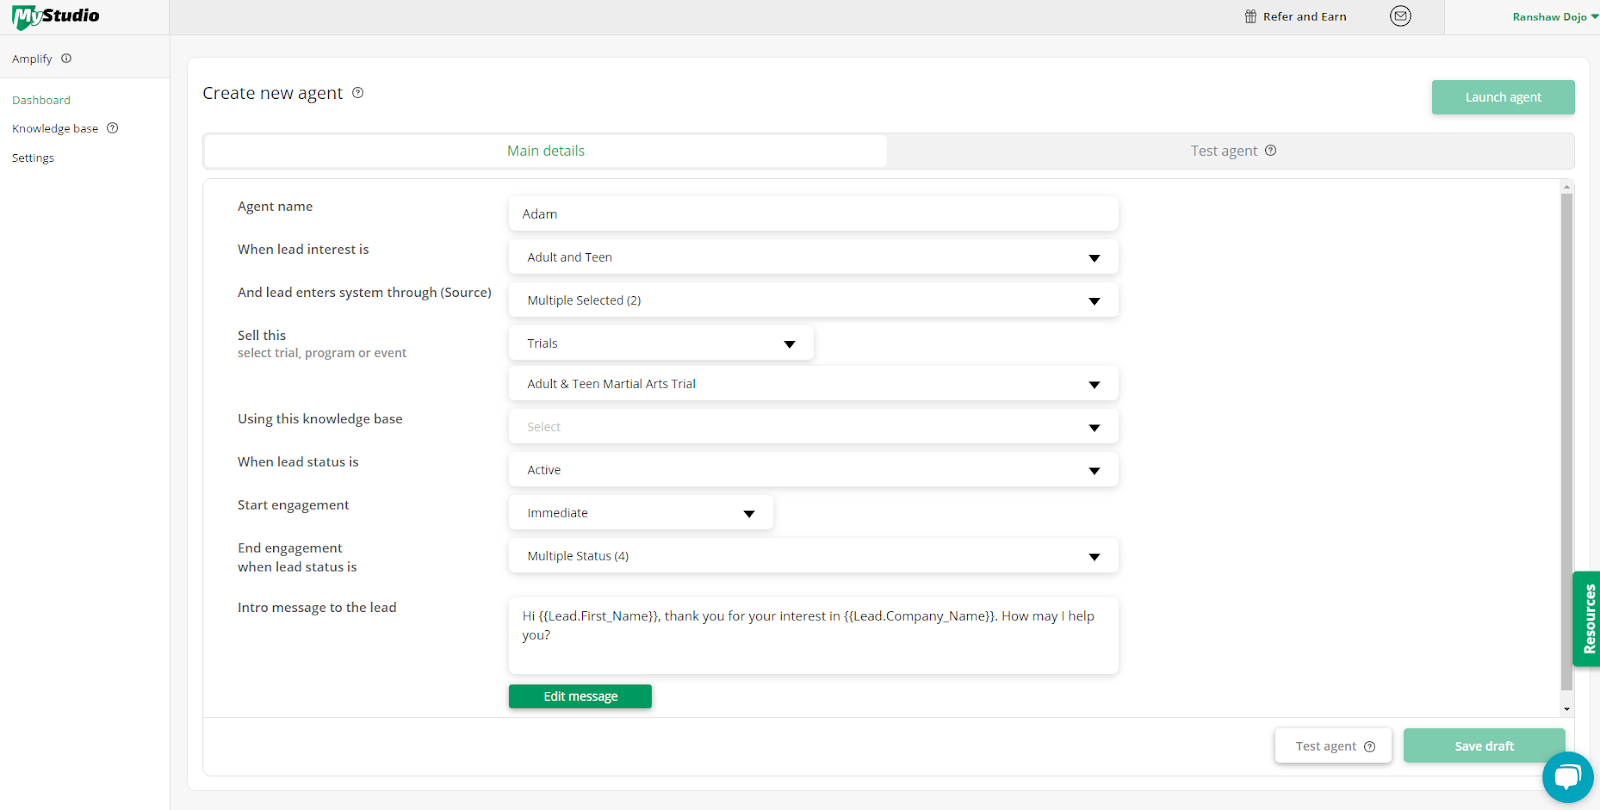
An agent is an AI human-like chatbot that engages with your customers at any time. The goal of these agents is to provide answers to frequently asked questions and convert potential clients into paying customers.
**Note**: Before creating an agent for lead conversion to a trial, ensure that the trial you are utilizing is connected to class schedule. This is required to get a customer immediately signed up for a class. You can check this setting in Services and Products \> Trials \> Edit the trial \> Select Start Date \> Custom Classes.
From Amplify \> Dashboard, click “create a new agent” and fill out the following information:
- **Agent Name**: Give your agent a human-sounding name
- **When lead interest is**: Select which program interest(s) the customer would enter into the lead form in order to prompt the agent’s interaction.
- **And lead enters system through (Source):** How was the lead entered into the system
- Website, lead forms, API
- Point of Sale
- Manually (By Staff)
- **Sell**: Select what offerings the chatbot can sell. Currently, only the “trials” option is available, but events and memberships will be added as options later for Amplify Plus members.
- **Using this knowledge base:** Select which knowledge base the AI will connect to for FAQ
- **When lead status is**: Select which status(es) prompts the agent’s interaction with the lead
- Deleted
- Active
- Enrolled
- Not Interested
- Custom
- **Start:** Select when the chatbot will begin a conversation with the lead.
- Immediately: immediately after status change. This is currently the only option.
- **End engagement when lead status is**: Select when the chatbot disengages from the lead
- Deleted
- Enrolled
- Not Interested
- Custom
- **Intro message to the lead**: keep the default message or create your own message that the agent will begin the conversation with.
[^ Back to top](https://help.mystudio.io/v1-amplify#TABLE)
---
#### Step 7: Test your Agent
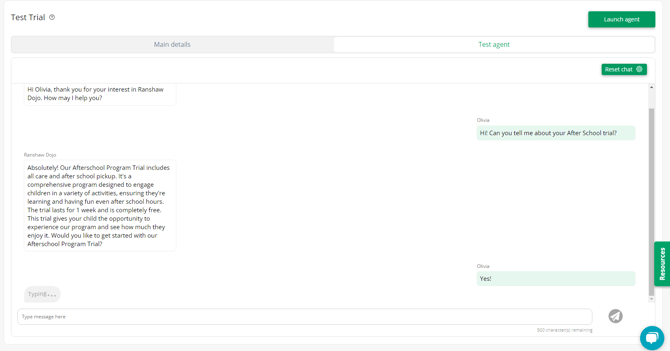
If you would like to see an example conversation with the chatbot before publishing the agent, you can click “Test agent.” Enter a fake lead name and program interest and then have a chat with your agent. This is purely a simulation of how the agent will interact with customers and will not affect your system or actually complete registrations.
**Note**: If you have not entered funds in your OpenAI account, the chatbot agent will type forever in this simulation and will not have a conversation.
[^ Back to top](https://help.mystudio.io/v1-amplify#TABLE)
---
#### Step 8: Launch your Agent
When you’re happy with your settings and testing, you can go back to the agent setup and launch the agent. Up until now, you are able to test Amplify fully without the MyStudio Amplify Add-on, but you will have to purchase the add-on in order to launch an agent.
After launching the agent, the agent will initiate text conversations for any new lead that meets the setup criteria. The agent can fully sell a trial and connected class registration to the customer by sending a pre-filled registration form.
You can also check on any conversations between the agent and customer by going to Communications \> Mobile Message \> Conversations and can even take over at any time by writing to the customer.
**Note**: This will only activate for new leads who have not entered your system yet.
[^ Back to top](https://help.mystudio.io/v1-amplify#TABLE)
---
- [Navigation & FAQs](https://help.mystudio.io/navigation-faqs?hsLang=en#main-content)
- [Code Ninjas Onboarding](https://help.mystudio.io/navigation-faqs?hsLang=en#code-ninjas-onboarding)
- [Classic Version \[V1\]](https://help.mystudio.io/classic-version-v1?hsLang=en#main-content)
- [Analytics](https://help.mystudio.io/classic-version-v1?hsLang=en#analytics)
- [Payments](https://help.mystudio.io/classic-version-v1?hsLang=en#payments)
- [All Customers](https://help.mystudio.io/classic-version-v1?hsLang=en#all-customers)
- [Participant Management](https://help.mystudio.io/classic-version-v1?hsLang=en#participant-management)
- [Member Migration](https://help.mystudio.io/classic-version-v1?hsLang=en#member-migration)
- [Leads](https://help.mystudio.io/classic-version-v1?hsLang=en#leads)
- [Primary Customers](https://help.mystudio.io/classic-version-v1?hsLang=en#primary-customers)
- [Communications](https://help.mystudio.io/classic-version-v1?hsLang=en#communications)
- [Attendance Automations](https://help.mystudio.io/classic-version-v1?hsLang=en#attendance-automations)
- [Program Automations](https://help.mystudio.io/classic-version-v1?hsLang=en#program-automations)
- [Event Automations](https://help.mystudio.io/classic-version-v1?hsLang=en#event-automations)
- [Lead/Trial Automations](https://help.mystudio.io/classic-version-v1?hsLang=en#lead-trial-automations)
- [Custom Automations](https://help.mystudio.io/classic-version-v1?hsLang=en#custom-automations)
- [Task Manager](https://help.mystudio.io/classic-version-v1?hsLang=en#task-manager)
- [Point of Sale](https://help.mystudio.io/classic-version-v1?hsLang=en#point-of-sale)
- [Attendance](https://help.mystudio.io/classic-version-v1?hsLang=en#attendance)
- [Class/Appointment Calendar](https://help.mystudio.io/classic-version-v1?hsLang=en#class-appointment-calendar)
- [Retail Order](https://help.mystudio.io/classic-version-v1?hsLang=en#retail-order)
- [Staff Schedule](https://help.mystudio.io/classic-version-v1?hsLang=en#staff-schedule)
- [Trials](https://help.mystudio.io/classic-version-v1?hsLang=en#trials)
- [Memberships](https://help.mystudio.io/classic-version-v1?hsLang=en#memberships)
- [Class Schedule](https://help.mystudio.io/classic-version-v1?hsLang=en#class-schedule)
- [Events](https://help.mystudio.io/classic-version-v1?hsLang=en#events)
- [Retail](https://help.mystudio.io/classic-version-v1?hsLang=en#retail)
- [Sales Channel](https://help.mystudio.io/classic-version-v1?hsLang=en#sales-channel)
- [Integrations](https://help.mystudio.io/classic-version-v1?hsLang=en#integrations)
- [Version 2 \[V2\]](https://help.mystudio.io/version-2-v2?hsLang=en#main-content)
- [Insights](https://help.mystudio.io/version-2-v2?hsLang=en#insights)
- [Payments](https://help.mystudio.io/version-2-v2?hsLang=en#payments)
- [Contacts](https://help.mystudio.io/version-2-v2?hsLang=en#contacts)
- [Amplify](https://help.mystudio.io/version-2-v2?hsLang=en#amplify)
- [Communications](https://help.mystudio.io/version-2-v2?hsLang=en#communications)
- [Services and Products](https://help.mystudio.io/version-2-v2?hsLang=en#services-and-products)
- [Attendance](https://help.mystudio.io/version-2-v2?hsLang=en#attendance)
- [Rank Promotions](https://help.mystudio.io/version-2-v2?hsLang=en#rank-promotions)
- [Marketplace](https://help.mystudio.io/version-2-v2?hsLang=en#marketplace)
- [Tools](https://help.mystudio.io/version-2-v2?hsLang=en#tools)
- [Sales Channel](https://help.mystudio.io/version-2-v2?hsLang=en#sales-channel)
- [User Settings](https://help.mystudio.io/version-2-v2?hsLang=en#user-settings)
- [Stripe](https://help.mystudio.io/stripe?hsLang=en)
- [Twilio](https://help.mystudio.io/twilio?hsLang=en)
- [Amplify](https://help.mystudio.io/amplify?hsLang=en)
- [My Account](https://help.mystudio.io/my-account?hsLang=en#main-content)
- [Plan and Billing](https://help.mystudio.io/my-account?hsLang=en#plan-and-billing)
- [Users and Permissions](https://help.mystudio.io/my-account?hsLang=en#users-and-permissions)
- [Business Profile](https://help.mystudio.io/my-account?hsLang=en#business-profile)
- [Business Account Management](https://help.mystudio.io/my-account?hsLang=en#business-account-management)
- [Member App Actions](https://help.mystudio.io/member-app-actions?hsLang=en)
- [Business Management App](https://help.mystudio.io/business-management-app?hsLang=en#main-content)
- [Business Manager App Sections](https://help.mystudio.io/business-management-app?hsLang=en#business-manager-app-sections)
- [ATA](https://help.mystudio.io/ata?hsLang=en)
- [Business How-To's](https://help.mystudio.io/business-how-tos?hsLang=en)
- [Multi-Location Franchise System / Management](https://help.mystudio.io/multi-location-franchise-system-management?hsLang=en)
- [Referral Program](https://help.mystudio.io/referral-program?hsLang=en)
- [Custom App Set Up](https://help.mystudio.io/custom-app-set-up?hsLang=en#main-content)
- [Google](https://help.mystudio.io/custom-app-set-up?hsLang=en#google)
[](https://www.mystudio.io/)
MyStudio.io Help Center
Copyright © 2025, MyStudio