
Updated: June 18, 2026
Table of contents
- Overview
- Step 1: OpenAI setup and connection
- Step 2: Build your knowledge base
- Step 3: Create an agent
- Frequently asked questions (FAQs)
- What does the agent do once it’s launched?
- How to monitor conversations
- Why should I use Amplify’s follow up automation?
- Is there a limit for how many days I can tell Amplify to wait before sending a follow up?
- Is there a limit for how many follow up messages I can tell Amplify to send?
- What time restrictions should I set for the follow up messages?
- What happens if I don’t enable automations?
- Is my customers’ data safe with Amplify?
- How do I get Amplify to engage with my current leads?
- Was this article helpful?
Permissions and accessibility
Staff access:
-
Admin: Full access
-
Manager: Full access
-
Staff: No access
MyStudio plan restrictions:
-
Amplify is an add-on to your MyStudio plan and comes in two plans (more information below).
-
You must have the communication enhancement add-on and a connected or legacy Twilio number. Click here to learn more: Twilio Integration: Add MyStudio Communication Enhancement Add-on and Create New Twilio Account.
-
You must get an OpenAI account (more information below).
-
Only scale plans are able to set up Amplify re-engagement.
Overview
What is Amplify?
Amplify is our AI system that automatically engages with leads when they enter your MyStudio account. Say goodbye to delays and hello to a frictionless, automated system that grows your business while you focus on what you do best.
Amplify Plans
While you can test Amplify to see how it would interact with customers without the add-on, you will have to get one of the MyStudio Amplify add-ons in order to fully utilize the product. There are two plans available:
Amplify
-
Allows one agent
-
Allows one knowledge base
-
Can sell trials
Amplify Plus
-
Allows 10 agents
-
Allows 10 knowledge bases
-
Can sell trials, events, and memberships

What is needed before setting up Amplify?
Before you can launch Amplify, you will need the following prerequisites:
-
One of the MyStudio Amplify (OpenAI) add-ons.
-
MyStudio Twilio add-on with a connected Twilio account.
-
An OpenAI account.
Tip: We also highly recommend setting up your trial and membership registrations to sign up for classes at the same time. Doing so will allow Amplify to register leads to not only the trial or membership but also get them in the door with a class registration. For steps on how to do this, click here: Step 1: Set up trial or membership custom classes.
What are the overall steps for complete Amplify setup?
- Purchase the Mystudio Amplify (OpenAI) and the Twilio add-on.
- Ensure you have a connected Twilio number. Click here to learn more: Add MyStudio Communication Enhancement Add-on and Create New Twilio Account.
- Create an OpenAI account with a minimum of $50 in funds and create and copy a secret API key.
- In MyStudio V2, paste the API key in Amplify > settings > “connect OpenAI.” This will connect OpenAI to your MyStudio account.
- Create an Amplify knowledge base in Amplify > knowledge base.
- Build an Amplify agent in Amplify > dashboard.
- Enter main details such as agent name, what it’s selling, what knowledge base it connects to and when to start and end engagement
- If you have Amplify plus, select to set up Amplify re-engagement if a lead stops responding.
- Test the agent.
- Launch the Amplify agent.
Step 1: OpenAI setup and connection
You will need an OpenAI account, an API key, and funds added to the account. To set this up:
Create an OpenAI account
You can create or login to an existing OpenAI account here: Create an OpenAI Account (Skip this step if you have one)

Verify OpenAI account
Effective December 17, 2025, Amplify has upgraded to ChatGPT-5.
This upgrade improves Amplify’s reasoning, response quality, and conversational flow, allowing agents to answer questions more accurately and convert leads more effectively.
To use ChatGPT-5, OpenAI now requires account verification. If your OpenAI account is not verified, Amplify may fail to respond or appear to load indefinitely.
To verify your OpenAI account:
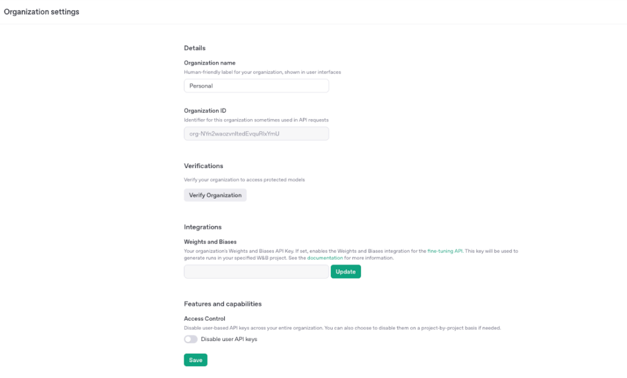
a) Go to the OpenAI "organization settings" page.
b) Locate the "Verifications" section and click "Verify Organization."
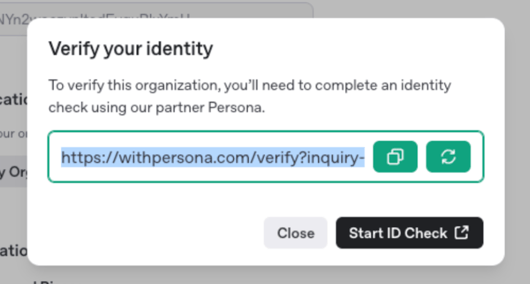
c) When prompted, click "Start ID check". It will take you to a new screen.
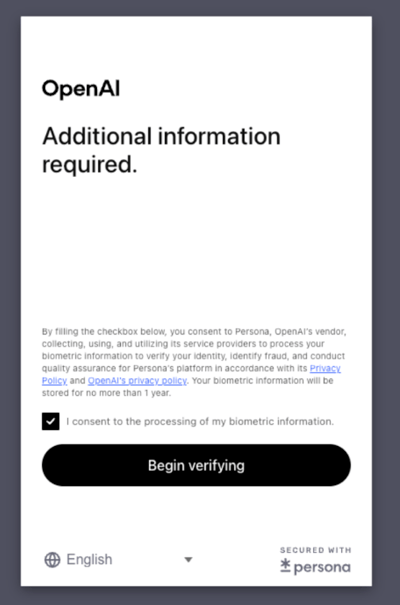
d) Click "Begin verifying"
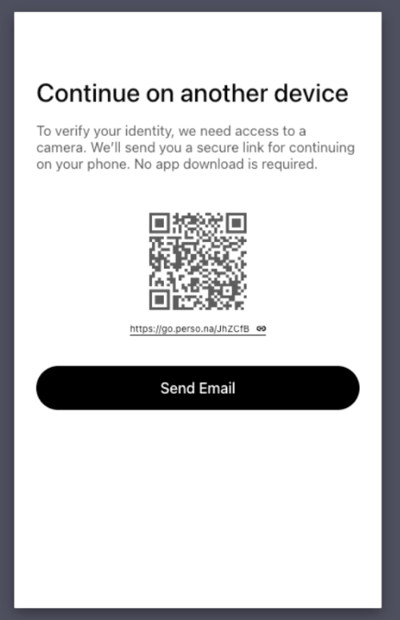
e) Continue on your mobile device by scanning the QR code or sending the verification link to your email.
f) You will be prompted to submit your valid government-issued ID through the secure third-party verification services.
g) Follow instructions to take a few photos of yourself to complete verification.
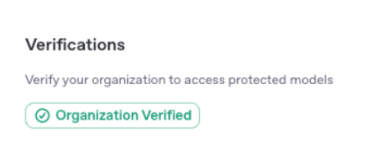
h) Once complete, return to "organization settings" and refresh the page. You should see "Organization Verified" in green text displayed under the verification section.
Add Funds
- In the OpenAI API platform, click the gear setting at the top right.
- On the left, click the billing section.
- Click “add payment details.”
- Enter payment details.
- Add a minimum of $50 in funds
- Enable auto-renewal to avoid service disruption
Important: Amplify will fail to engage with leads if your OpenAI account lacks sufficient funds or available credits.
Maintaining an active balance is critical to avoiding service interruptions that result in missed conversions and registration link failures.

Generate a Secret API Key
- While still in the OpenAI API settings, click the “API keys” section on the left.
- Click “create new secret key.”
- Name the key and select a project (default is fine).
- Allow all permissions and complete the key creation.
- Copy the key immediately.
- In MyStudio, go to Amplify > Settings > “connect OpenAI” and paste the key.
Tip: If managing multiple locations with one OpenAI account, generate a unique key per location to track usage.


Step 2: Build Your Knowledge Base
What is a knowledge base, and do I need one?
The knowledge base is the brain of Amplify. We recommend using it as if you were training your staff about your products and your business. If you have the Amplify plus add-on, you can even add additional knowledge bases that align with specific products, ensuring a higher chance of sign up success.
Note: You have to have at least one knowledge base in order to launch an agent.
Knowledge base set up
- In V2, go to Amplify > Knowledge Base.
- Click “add new” at the top right or click the existing knowledgebase name to edit.
- Name your knowledge base if creating a new one.
- Click Add new FAQ on the top right.
- Enter a question and answer.
- Repeat for all common questions your customers ask.
Note: Info from trials, membership, and event setup is auto-imported, but adding custom FAQs improves response accuracy.


Highly suggested knowledge base questions
To ensure Amplify always provides the correct contact information, you should add the following three questions to your knowledge base:
- What is your studio address?
- What is your studio phone number?
- What is your studio email address?
Amplify relies on these questions to answer customer inquiries correctly.
Multiple locations
If you use one MyStudio account for multiple locations, you need to add separate questions for each location, clearly specifying:
- The full address for each location
- The phone number for each location
- The studio email address for each location.
Examples:
- "What is the address of the Downtown location?
- What is the phone number for the North Studio?
- What is the email address for the East Side location?
Each location needs to be listed as its own set of questions so Amplify can respond accurately based on the customer's inquiry.
You do not need a large knowledge base to get started, but these contact questions are highly suggested before connecting a knowledge base to an agent.
Step 3: Create an agent
What is an Amplify agent?
An agent is an AI chatbot that engages new leads, answers FAQs, sells products, and registers leads for their first class automatically.
Basic steps to create an agent
The basic steps to creating an agent are:
- Set up custom classes for trials or memberships.
- Create an agent from Amplify > dashboard.
- Set up the agent’s details.
- (Optional) Set up the agent’s re-engagement automation if you have the Amplify plus add-on.
- Test the agent.
- Launch the agent.
Step 1: Set up trial or membership custom classes
Before creating an agent for lead conversion to a trial or membership, ensure that the trial or membership you are utilizing is connected to class schedule. This is required to get a customer immediately signed up for a class through Amplify.
To set up product custom classes in V1:
- Ensure you have created classes.
- Edit an existing trial or membership from services and products.
- Go to the “select start date” or “select classes” section of the product set up.
- Select “custom classes” from the drop down.
- Choose which classes connect to the particular trial or membership. This will allow registrants to sign up for the first class at the same time as their trial or membership registration, and it allows Amplify to register leads for a class as well.

Step 2: Create an agent’s main details
- In V2, go to Amplify > Dashboard > Create a new agent or click on an existing agent to edit
- Fill in the following settings:
- Agent Name: Choose a human-sounding name.
- When lead interest is: Choose the lead interest that triggers the agent.
- Lead enters system through: Pick the ways that the lead enters the system (website, lead form, API, POS, manual) that triggers the agent. For example, you may not want to trigger the agent if the lead was entered manually into the system.
- Sell: Choose what specific product the agent sells.
- Using this knowledge base: Choose the knowledge base the agent uses.
- When lead status is: Set which status(es) triggers interaction.
- Start: Set to Immediately (only option).
- End engagement when lead status is: Set which status(es) ends the interaction.
- Intro message: Customize or use the default greeting.
- Save draft at the top right.

Step 3: Set up agent follow up automation (Amplify plus only)
The automation allows Amplify to follow up with leads when the lead stops interacting.
- Enable Amplify follow up automation if desired.
- Fill in the following settings:
- Follow up wait time: when Amplify will start re-engaging with the lead
- Follow up count: the maximum number of times (up to 10) Amplify will attempt re-engagement. This number resets if the lead responds again.
- Send time restriction: time frame that Amplify will not send an automated message.
- Scenarios: you can set up specific guidelines for how Amplify follows up.

Step 4: Test and launch the agent
- In the agent setup, click Test Agent.
- Enter a fake lead name and interest.
- Interact with the test agent to review behavior.
- When everything looks good, launch the agent.
Important: You must purchase the MyStudio Amplify Add-on before launching.

Frequently asked questions (FAQs)
What does the agent do once it’s launched?
- Automatically messages new leads that meet your setup criteria
- Can fully sell a trial and send a pre-filled registration link
- You can view or take over conversations anytime
How to monitor conversations
- Go to Communications > Mobile Messages
- Click the drop down and select to see Amplify conversations
- Review past agent chats or reply manually if needed
Note: Amplify only engages new leads (not existing ones already in your system)

Why should I use Amplify’s follow up automation?
Amplify automations help increase conversions by:
- Automatically sending follow up messages when a lead doesn't reply
- Keeping conversations active without needing manual follow up
- Ensuring no potential customer is forgotten or dropped
The automations are especially useful for busy teams that want to stay hand-off while still maximizing lead conversion.

Is there a limit for how many days I can tell Amplify to wait before sending a follow up?
Yes, you can only tell Amplify to wait a maximum of 10 days before sending a follow up.
Is there a limit for how many follow up messages I can tell Amplify to send?
Yes, Amplify can only send a maximum of 10 follow up messages to each customer. Note that if the customer responds again, this count resets.
What time restrictions should I set for the follow up messages?
Amplify will engage with leads even when your business isn’t open. However, for the follow up messages, it is recommended to turn this restriction on during hours your studio is closed. This way, if someone sends you a message, they’ll still have a way to contact you if needed.
What happens if I don’t enable automations?
If you don’t enable automations, Amplify will send the initial message to the lead and engage in conversation with the lead as long as Amplify receives a response. If the lead does not respond to Amplify’s message, Amplify does not engage, nor follow up.
Is my customers’ data safe with Amplify?
Yes! Our AI never stores personal data or accesses other customers’ information. Amplify only shares your product interest and name with your MyStudio account so the registration link comes pre-filled.
How do I get Amplify to engage with my current leads?
Amplify will only engage with new leads that enter the system after you launch an agent.