
Table of contents
Permissions and accessibility
Staff access:
-
Admin: Full access
-
Manager: Full access
- Staff: No access
MyStudio plan restrictions:
- Communication history is dependent on your plan
- Starter: 14 days
- Growth: 30 days
- Scale: 24 months
- Communication edits / deletion is dependent on your plan
- Starter: cannot see scheduled communication
- Growth: cannot see scheduled communication
Additional users
Add additional users
To add an additional user to a primary customer profile,
1. Go to "All Customers."

2. Find and click on "Primary Customers."

3. Click on the name of the primary customer you want to add the user to.

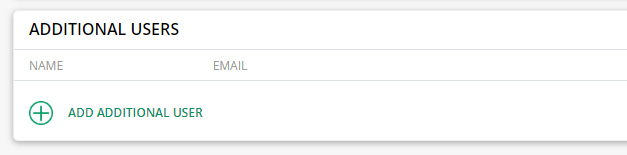
4. At the bottom of the page, click on "ADD ADDITIONAL USER."

5. Enter the Additional User's first name, last name, and email address.

6. Once added, the additional user will appear
-
Under the primary customer's profile
- In the "Additional Users" section found under "All Customers"
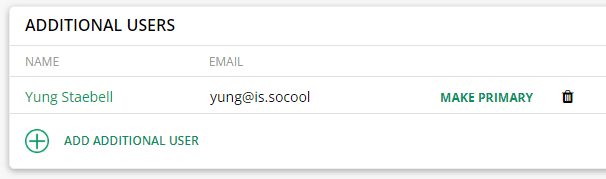
You can switch the roles of the additional user and the primary customer. If you click “make primary” next to the additional user’s name, the additional user will become the primary customer, and the primary customer will become the additional user.
You can also delete any additional users by clicking the trash can or add more users.
Primary customers vs additional users
Primary customers and additional users have some distinct differences between them.
1. Registrations will not be listed under additional users.
While additional users can purchase registrations for any of the participants or themselves, these registrations will not appear under the additional user’s profile. All registrations will show under the primary customer.
2. Additional users will not see the primary customer’s payment information.
Additional users can add their own payment information to pay for registrations and retail, but they will not see the primary customer’s payment information.
Note: Additional users will, however, see if there are past due payments for recurring fees. They will be able to see the last four digits of the card or bank used by the primary customer attached to those registrations and can update the scheduled billing information to their own payment info.
3. The most common use case is for students to see their curriculum and schedule classes.
While the primary customer is the main individual being charged for the business’s services, a lot of times the additional user is a teenager with their own mobile device who drives themselves to classes. These individuals are listed as additional users so that they can schedule classes themselves or access their resources without having to borrow a parent’s phone.
The other primary use case for additional users is split parents. Listing one parent as the additional user allows them to still access the curriculum or receive communications for the participants.
Table
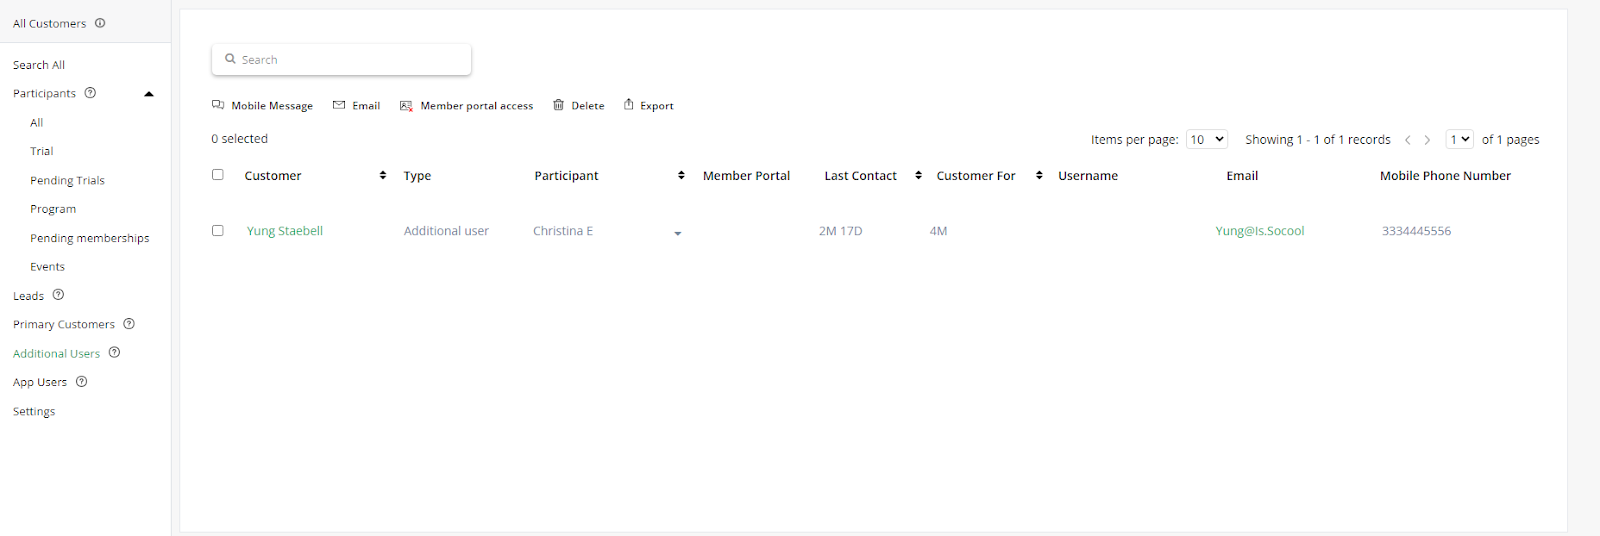
Access the additional users table from all customers > additional users. You will see the following information:
- Customer: the additional user. Clicking the name will redirect you to the additional user profile
- Type: additional user
- Participant: a drop down of the participants connected to the additional user
- Member portal: the member portal icon symbolizes that the additional user has accessed the app
- Last contact: the amount of time that has passed since last communication
- Customer for: the amount of time that has passed since the additional user was added
- Username: the username the additional user uses to access the member app
- Email: click the email to open email communication. If email is unsubscribed or bounced, you can click on it to send an invite to resubscribe or unblock.
- Mobile phone number: if the phone number is unsubscribed or bounced, you can click on it to send an invite via email to resubscribe or unblock.
Above the table you will see the following actions:
- Mobile message: send an in-app message or SMS
- Member portal access: enable or disable the additional user’s access to the member app
- Delete: additional users CAN be deleted without canceling registrations. This is because the participants and registrations will remain under the primary customer.
- Export
Additional user profile

Clicking on the additional user’s name from the table will bring you to the additional user profile. On the left you will see the following:
- Additional user name
- Primary customer name: clicking this will redirect you to the primary customer profile
- Customer since: the date the additional user was added to the system. This can be edited at any time by clicking the pencil
- Email icon
- Mobile message icon
- Plus button: register a participant for a service or make a purchase
- Info: shows the additional user’s information such as payment info and contact info
- Communication: shows the communications sent and scheduled to the additional user
Info

In the info section, you will see various details connected to the additional user. This includes:
- Payment method: view which credit cards and bank accounts are on file for the customer.
- Delete any cards by clicking the trash can.
- Click the pencil next to the primary credit card to update the card on file.
- If the customer needs to add a new bank account, click “add new bank account.” This will send a link to the customer so that they can update or enter the banking information.
NOTE: For security reasons, you will not be able to enter full banking information into an account. This can only be done by the customer through this type of link or from within the member app.
- Customer information: view and edit any of the additional user’s contact information. If you are updating the information and are told that the email or phone number is associated with a different customer, you will be prompted to merge if you wish. For more detailed information on how to merge, check out our article: Merging.
- Participants: this is a full list of the participants connected to the additional user
- Edit the participant’s name or birthday by clicking the pencil next to their name
- “Delete” the participant by clicking on the trash can. This does NOT actually delete the data associated with the participant unless they were only attached as a lead. If the participant had registrations, you will be prompted to merge that information into a different participant either under the same buyer or a different buyer.
Communication
Sent communication
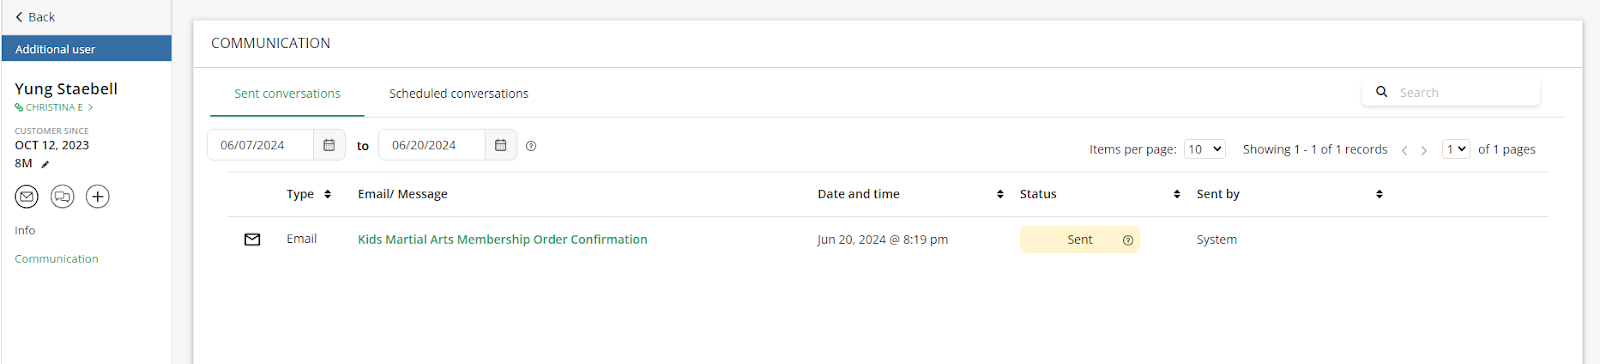
In the communication section in the additional user profile, you will see a list of past conversations sent to the additional user. All forms of communication will appear here, including system emails for registrations, migration, etc. You can specify a certain time frame within your MyStudio plan limitations from the calendar ranges above the table.
The table will show you:
- Type: email, SMS, or in-app message
- Email / Message: a brief beginning of the message
- Date and time: the date and time the communication was sent
- Status:
- Email
- Opened
- Clicked
- Bounced
- SMS
- Delivered
- Undelivered
- Failed
- Bounced
- Read
- In app
- Sent
- Read
- Sent by: who sent the communications
- Staff member
- Amplify
- Automation
- System
You can click on any of these communications to be redirected to the full conversation.
Scheduled conversations
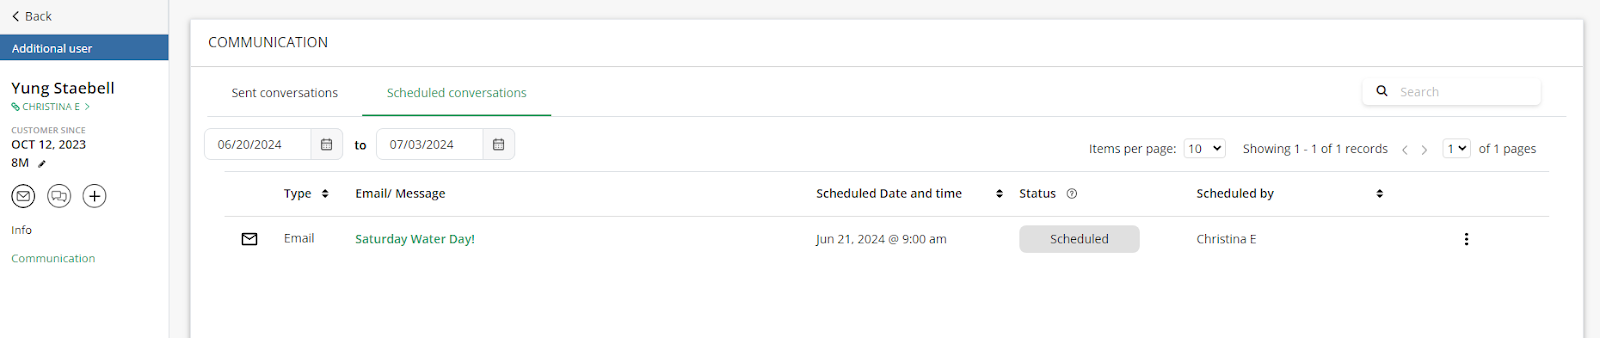
If you are on our scale plan, you will also have a tab to view scheduled communications from right within the additional user profile. You can specify a certain future time frame from the calendar ranges above the table up to 24 months in the future.
The table will show you:
- Type: email, SMS, or in-app message
- Email / Message: a brief beginning of the message
- Scheduled date: the date and time the communication was scheduled to send
- Status: scheduled
- Scheduled by: who scheduled the communications
- Staff member
- Automation
You can also select to edit or delete the scheduled message directly from this section.
App users
Table
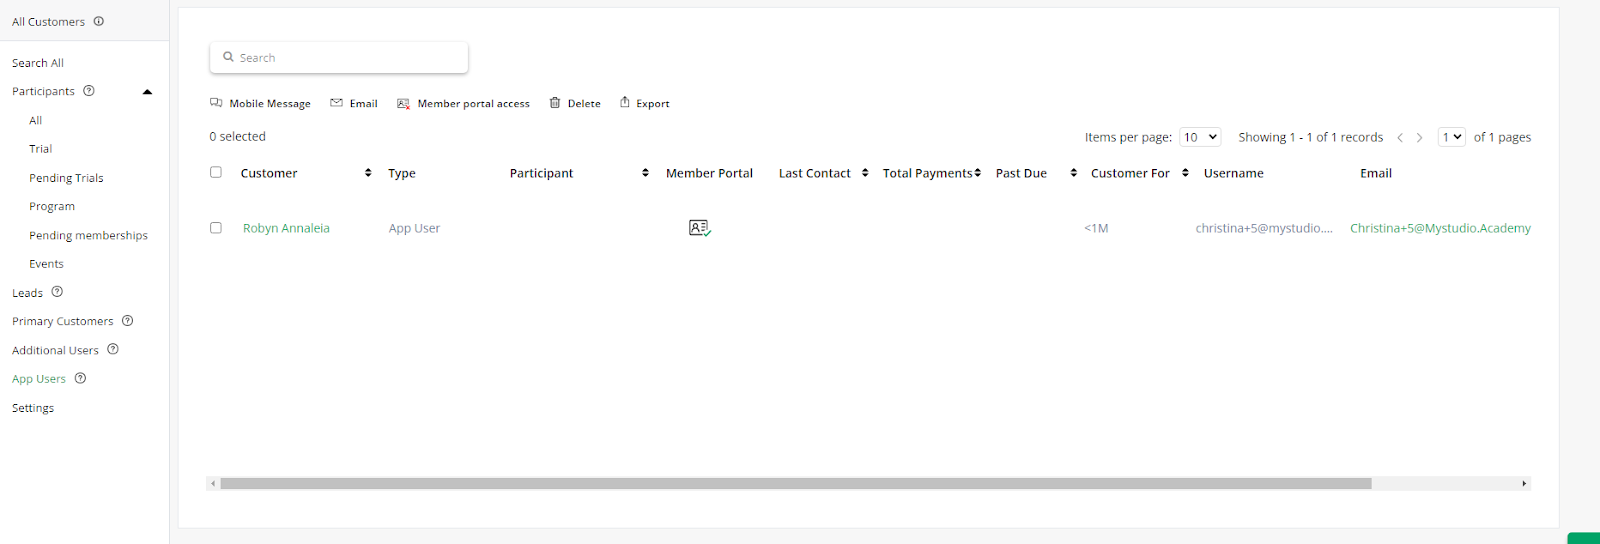
App users are potential customers who have accessed your member app but have not made any purchases or registrations.
Access your app users through all customers > app users. You will see the following information:
- Customer: the app user. Clicking the name will redirect you to the app user profile
- Type: app user
- Participant: this will always be blank because app users haven’t made any registrations with participants. Once they make a purchase or registration they become primary customers.
- Member portal: the member portal icon symbolizes that the app user has accessed the app. App users will always have the icon.
- Last contact: the amount of time that has passed since last communication
- Total payments: this will always be blank
- Past due: this will always be blank
- Customer for: the amount of time that has passed since the app user was added to the system
- Username: the username the app user uses to access the member app
- Email: click the email to open email communication. If email is unsubscribed or bounced, you can click on it to send an invite to resubscribe or unblock.
- Mobile phone number: if the phone number is unsubscribed or bounced, you can click on it to send an invite via email to resubscribe or unblock.
Above the table you will see the following actions:
- Mobile message: send an in-app message or SMS
- Member portal access: enable or disable the app user’s access to the member app
- Delete: app users CAN be deleted because there are no purchases or registrations associated with them
- Export
App user profile
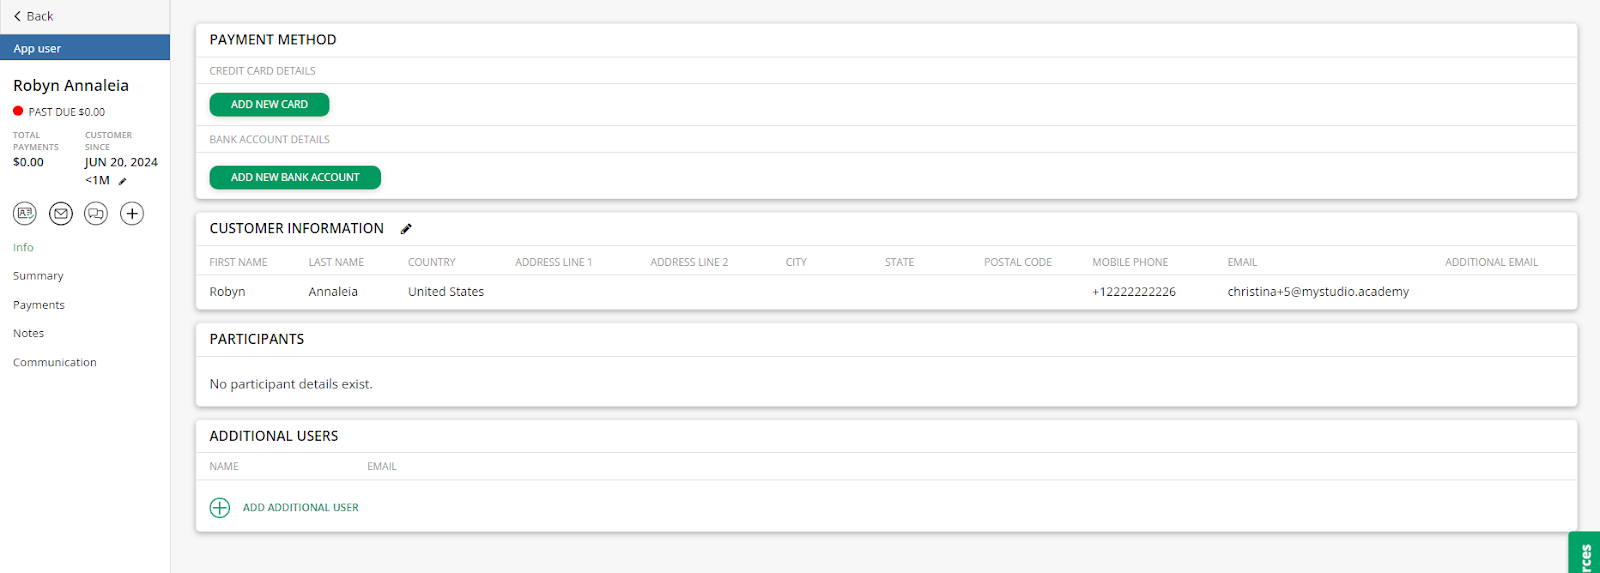
Clicking on the app user’s name will bring you to the app user profile. The majority of the sections in this profile will be empty, but you can still enter information to prepare for them to become a primary customer.
On the left here, you can see:
- Past due payments: this will always be $0
- Total payments: this will always be $0
- Customer since: how long the app has been in the system. You can edit this date at any time.
- App access icon: enable or disable app access
- Email icon
- Mobile message icon
- Plus button: register a new participant for offerings or make purchases. Completing a registration or purchase will automatically make an app user a primary customer.
- Info: info connected to the app user, including payment methods, customer information, participants, and additional users.
- Summary: a summary of all participants’ registrations. This will always be blank.
- Payments : payments associated with all participants under the app user. This will always be blank.
- Notes: view or add notes associated with any of the participants. This will always be blank.
- Communication: view all sent and scheduled communication to the app user
Info

In the info section, you will see various details connected to the app user. This includes:
- Payment method: view which credit cards and bank accounts are on file for the customer.
- Add new credit card information.
- Delete any cards by clicking the trash can.
- Click the pencil next to the primary credit card to update the card on file.
- If the customer needs to add a new bank account, click “add new bank account.” This will send a link to the customer so that they can update or enter the banking information.
Note: For security reasons, you will not be able to enter full banking information into an account. This can only be done by the customer through this type of link or from within the member app.
- Customer information: view and edit any of the app user’s contact information. If you are updating the information and are told that the email or phone number is associated with a different customer, you will be prompted to merge if you wish. For more detailed information on how to merge, check out our article: Merging.
- Participants: this will always be blank
- Additional users: lists additional users attached to the app user. Additional users act as their own accounts, but are directly connected to the participants and registrations of the participants under the primary customer. This means that they can register the participants for things, access resources, and see class schedules for the participants.
- Add additional users by clicking “add additional user” and entering the first name, last name, and email.
Communication
Sent communication

In the communication section in the app user profile, you will see a list of past conversations sent to the app user. All forms of communication will appear here, including system emails for registrations, migration, etc. You can specify a certain time frame within your MyStudio plan limitations from the calendar ranges above the table.
The table will show you:
- Type: email, SMS, or in-app message
- Email / Message: a brief beginning of the message
- Date and time: the date and time the communication was sent
- Status:
- Email
- Opened
- Clicked
- Bounced
- SMS
- Delivered
- Undelivered
- Failed
- Bounced
- Read
- In app
- Sent
- Read
- Sent by: who sent the communications
- Staff member
- Amplify
- Automation
- System
You can click on any of these communications to be redirected to the full conversation.
Scheduled communication

If you are on our scale plan, you will also have a tab to view scheduled communications from right within the app user profile. You can specify a certain future time frame from the calendar ranges above the table up to 24 months in the future.
The table will show you:
- Type: email, SMS, or in-app message
- Email / Message: a brief beginning of the message
- Scheduled date: the date and time the communication was scheduled to send
- Status: scheduled
- Scheduled by: who scheduled the communications
- Staff member
- Automation
You can also select to edit or delete the scheduled message directly from this section.