Steps needed for new MyStudio customers to setup, verify and provide bank account details for payment settlements via Stripe.
Overview
Ensure you are quickly set up to accept payments via Stripe.
Permissions and accessibility
Staff access:
- Setup of Stripe MUST be done by the Studio/Business owner
Specifications
Getting Started
Upon logging into your account, you will see a banner at the top of the page prompting you to take action for your account. Clicking this banner will automatically redirect you to Stripe to begin account setup.
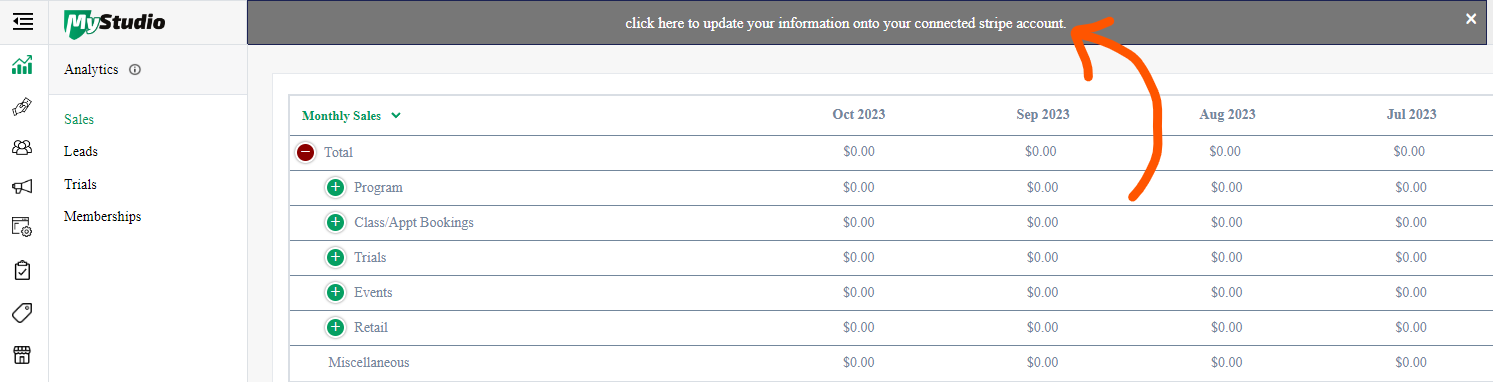
NOTE: If you don’t see the banner at the top of your control panel, you can also access the Stripe setup page by going to payments > view Stripe payouts > click the pencil next to personal details.
Business information

The first step is to fill out your business information. This includes:
- Type of business: most of the time this is selected as “company.”
- Business structure
- Legal business name: if you selected “individual” for type of business, you do not have to fill out business details
- Employer Identification Number (EIN): in the US, if you are a business with employees then you are required to have an EIN. If you are a sole proprietor or single LLC without employees, then you are able to enter your SSN instead.
- Doing business as: this is an optional field
- Registered business address
NOTE: If you already have a Stripe account, you still need to create this new one since it is directly connected to MyStudio and there is no way to connect a pre-existing Stripe account to MyStudio. This should not be a problem, as Stripe allows you to have two accounts with the same legal entity.
Personal details
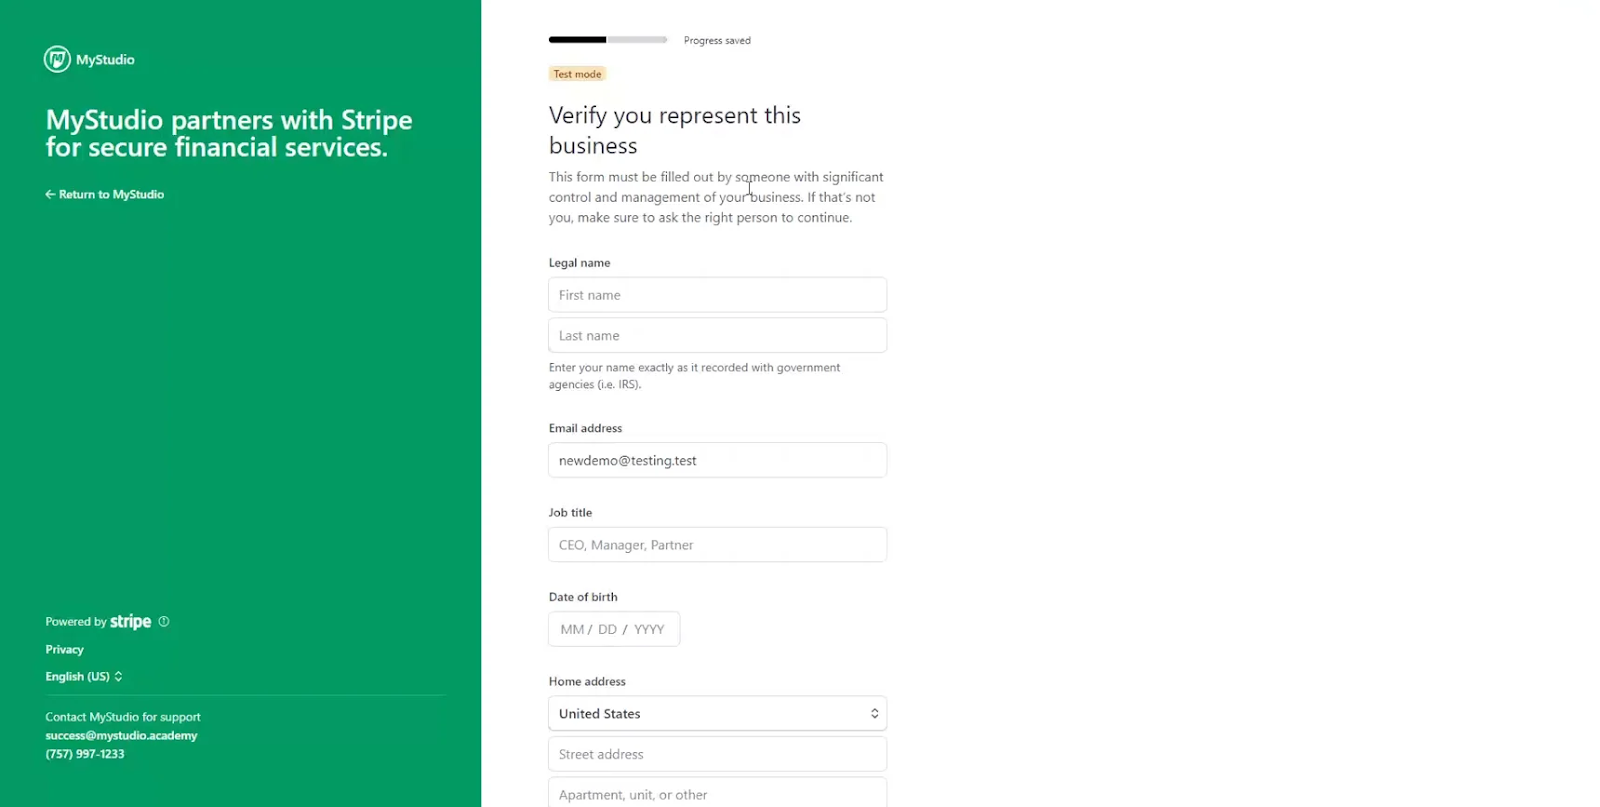
Next, you will need to verify your identity and connection to the business. You will need to enter:
- Legal first and last name
- Email address: this is directly connected to the email address on file with MyStudio
- Job title
- Date of birth
- Home address
- SSN: if you labeled your type of business as an individual, you will be asked for your SSN
- Business owner: if you are a representative of the company and not a business owner, you will need to add the business owner’s information as well. Otherwise, if you are the business owner, you can “continue with no owners.”
Once completed, you will be redirected to a confirmation screen and you can return to MyStudio.
.png?width=688&height=330&name=image%20(7).png)
Payout details (bank information)
.png?width=688&height=343&name=image%20(8).png)
When you return to MyStudio, you will have a popup that redirects you to payments > view stripe payouts. You will need to enter your payout details so that profit gets deposited into your bank correctly.
Click “update” next to “payout details” then choose your payout method.
.png?width=688&height=344&name=image%20(9).png)
- Debit card: enter your debit card information
- Bank account (ACH):
- Bank routing number: if you are in Canada, the routing number is the transit number + branch number. This will look like 11000000 when typed, but you will see it formatted correctly as 11000-000 once added.
- Bank account number
- Holder name
- Holder type
Ensuring Stripe KYC is correctly set up
If you chose “company” during the setup process, the MyStudio view Stripe payouts section will show personal details as “not applicable” and there will be a green checkmark next to both the business details and payout details.
If you chose “individual” during the setup process, the MyStudio view Stripe payouts section will show company details as “not applicable” and there will be a green checkmark next to both the personal details and payout details.
Once these are completed, you will be prepared to start processing payments via Stripe!