
Table of contents
Permissions and accessibility
Staff access:
-
Admin: Full access
-
Manager: No access
-
Staff: No access
MyStudio Plan Restrictions:
-
Starter plans cannot change the order of the app buttons
Home screen
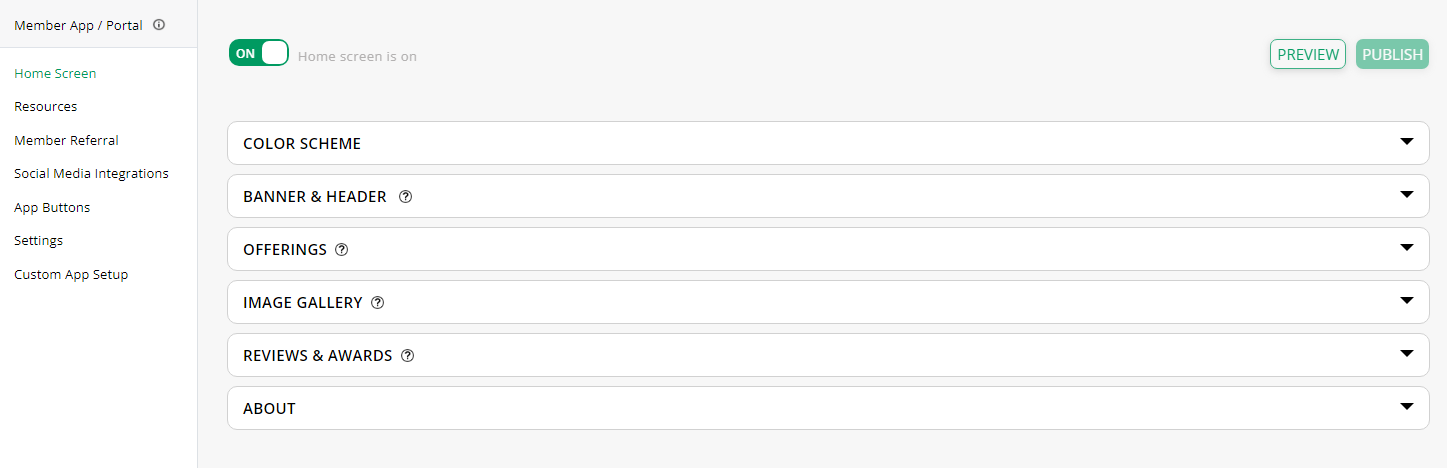
In sales > member app / portal > home screen, you can turn the home screen on or off. If the home screen is turned on, then customers will see it immediately after logging in to the member app.
While making changes to your customization, be sure to hit “publish” at the top right to save changes. You can also preview these changes at any time by publishing then clicking “preview” and creating your own login for the member app.
Color scheme

Select a color closest to your business’s marketing color.
Banner & header
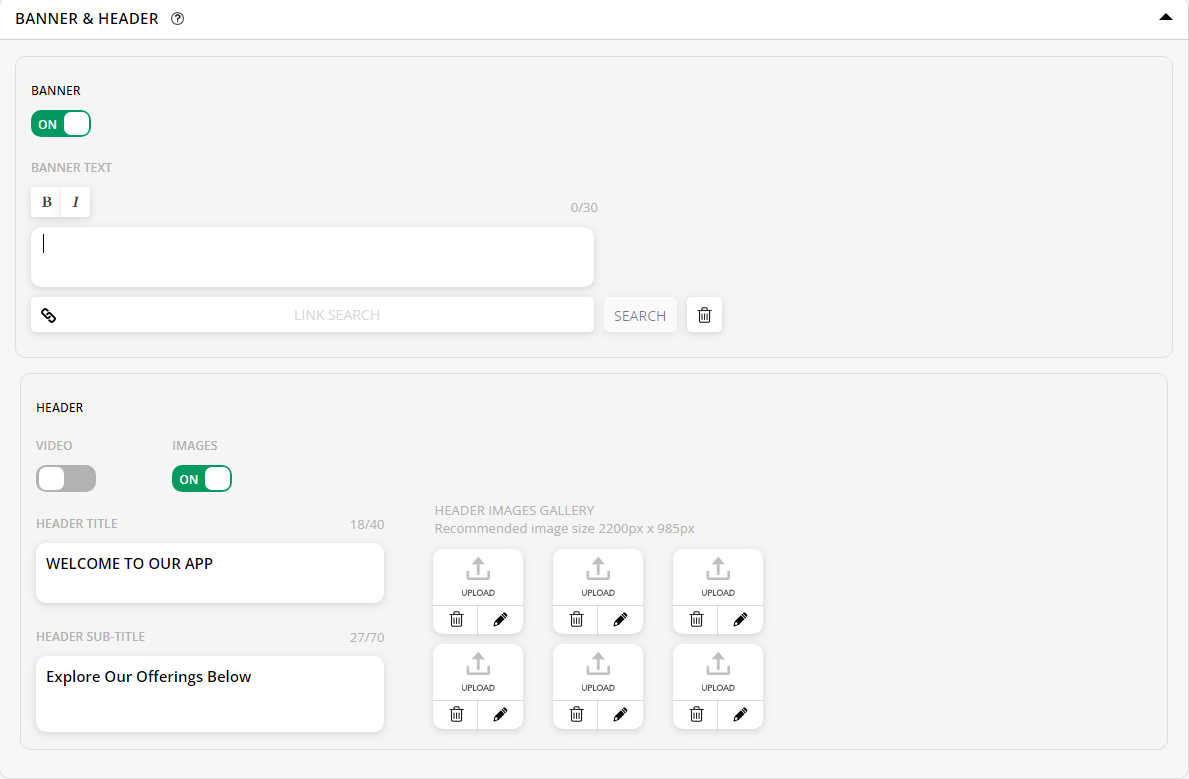
Decide to give the home page a banner. This is a yellow strip at the top of the home screen that displays text and can hyperlink to a service or product you provide through MyStudio. This is often used in cases of advertising events or current sales you have.
Add the text you would like in the text box. To add a link, type in the name of an existing offering in your system and click search. If you want to add the full category link, such as the main events list page, you will still need to search for a specific event first.

The header displays below the banner. Choose whether this contains a video or images.
- Video: If you select to use video, enter a Vimeo or YouTube URL.
- Images: If you select to use images, add a title and subtitle to your header. Then you can upload up to six images which will scroll through on the homepage. Images must be JPEG or PNG files and be 2200px width x 985px height in size.
- If images are smaller: if your image is smaller than the size above, our system will automatically re-size it to the correct size. This will result in pixelated images and croppings on larger screens.
- If images are larger: if your image is larger than the size above, our system will automatically crop it to the correct size.
If you want the full image to be visible at all times, we recommend putting the image on background. To do this:
- Edit your image to be a height of 985px. Be sure to keep the size ratio the same.
- Create a blank canvas in paint, photoshop, or other software that is sized at 2200px width x 985px height.
- Paste your image to the canvas and center it. Then save.
This way a full image is displayed on all screen types and will change dynamically as you adjust your screen size.
Offerings
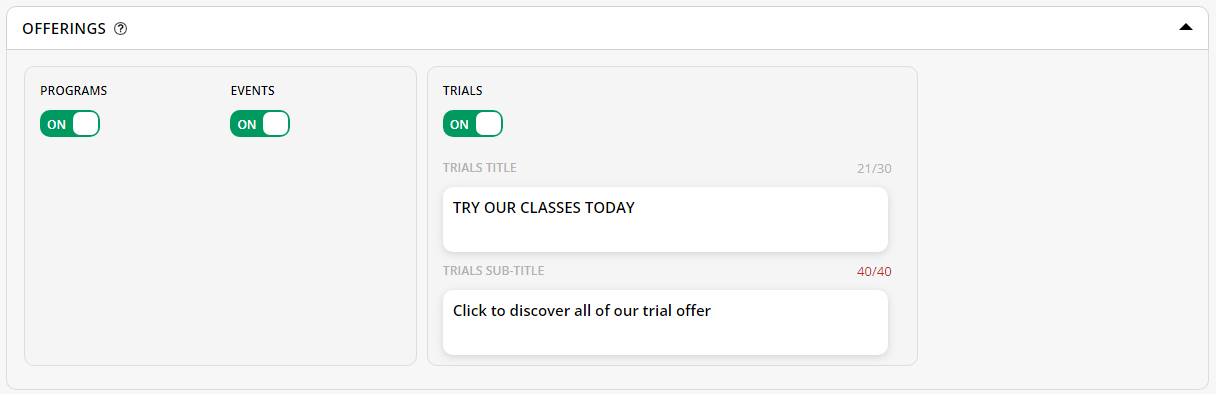
Turning on different services in the offerings section will determine if they are displayed on the home page. If these are turned off, they will still be in the member app, just not on the home screen. You are able to add three items to the home screen: programs, events, and trials.
Trials also allows you to add marketing text through a title and subtitle. These will hyperlink to the trial offerings, so make sure you add catchy text that will entice potential customers to click on it.
Image gallery
The image gallery allows you to add up to 12 photos to the homepage. We recommend using all of these spaces for the best visual effect. These images must be 1200px width x 800px height.
Use the same steps mentioned above in “banner and header” to get your photo ratios correct, but edit the photo to a 800px height instead.
Images will display closer to the bottom of the home screen and customers can click on the images to view it in full.
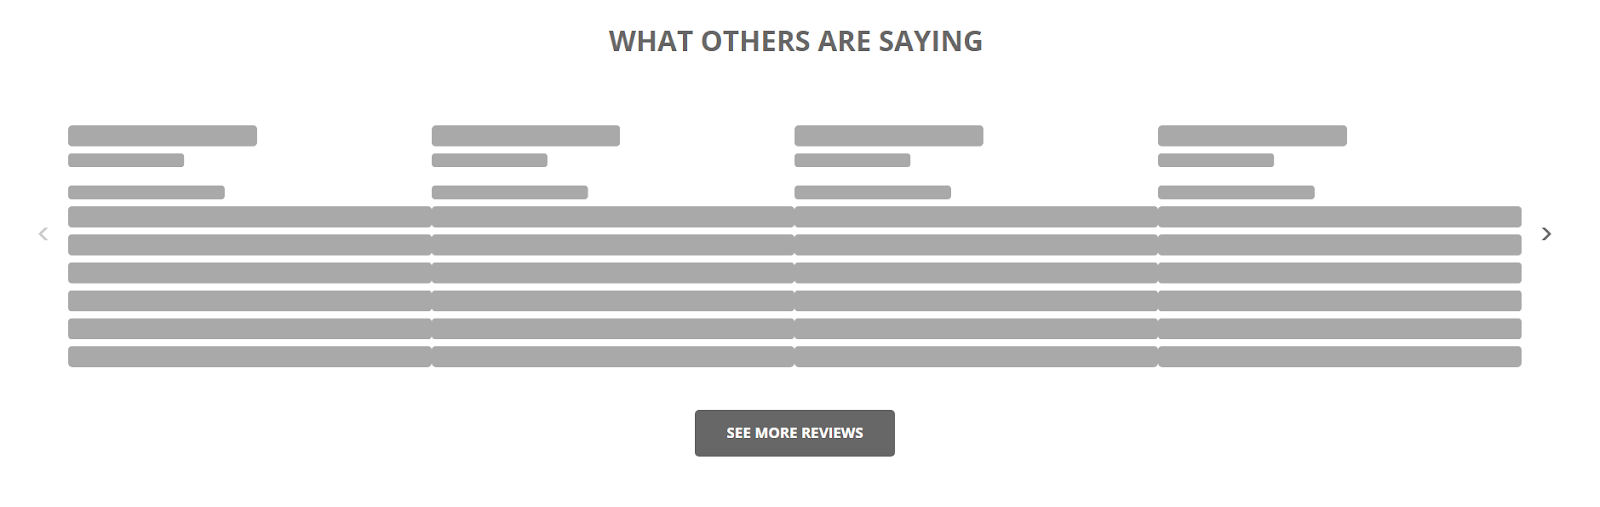
Reviews & awards

Turning on the reviews and awards section will display images you upload of different reviews or awards.
- Reviews: image size must be 360px x 205px
- Awards: image size must be 150px x 150px
You will be asked to crop the images before uploading.
Use the same steps mentioned above in “banner and header” to get your photo ratios correct, but edit the photo to a 360 px (for reviews) or 150px (for awards) height instead.
You can also link a social reviews page that customers can click on to be redirected. To add this, see below in the “social media integrations” section of this article. This will display as a “see more reviews” button below the review images.
Important: Linking the social review page will NOT auto-fill the images. You must upload images manually.
Reviews will display above your images and awards will display below your header.
About

The about section tells customers what your business is all about. This is a great place to put mission statements or brand values. This displays at the bottom of the home screen.
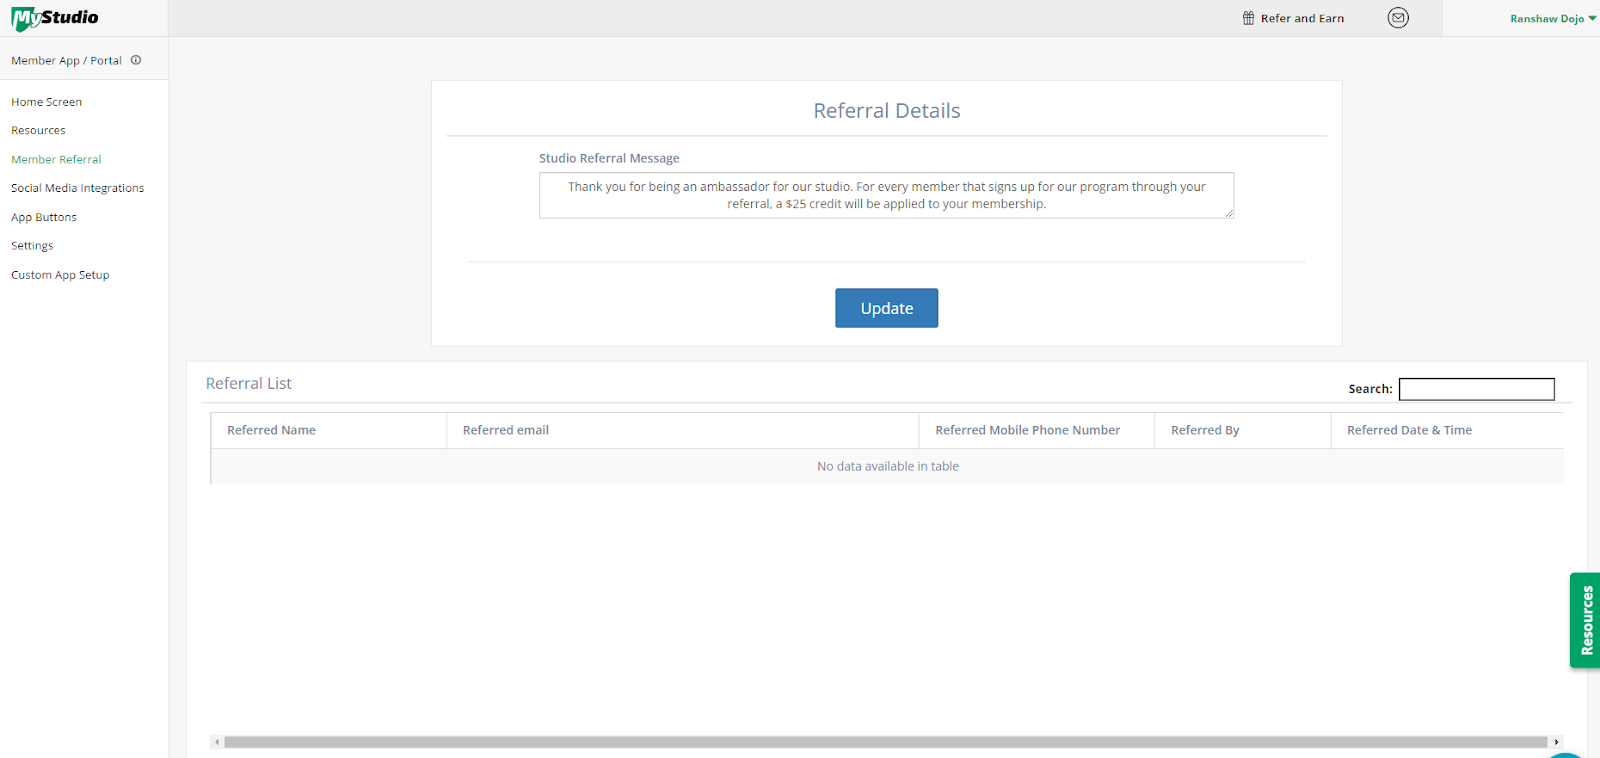
Member referral

In the member app there is always a place for customers to refer your business to other people. You can edit the text that displays from sales > member app / portal > member referral. This page will also display a list of referred members and their contact information as well as who referred them.
Social media integrations
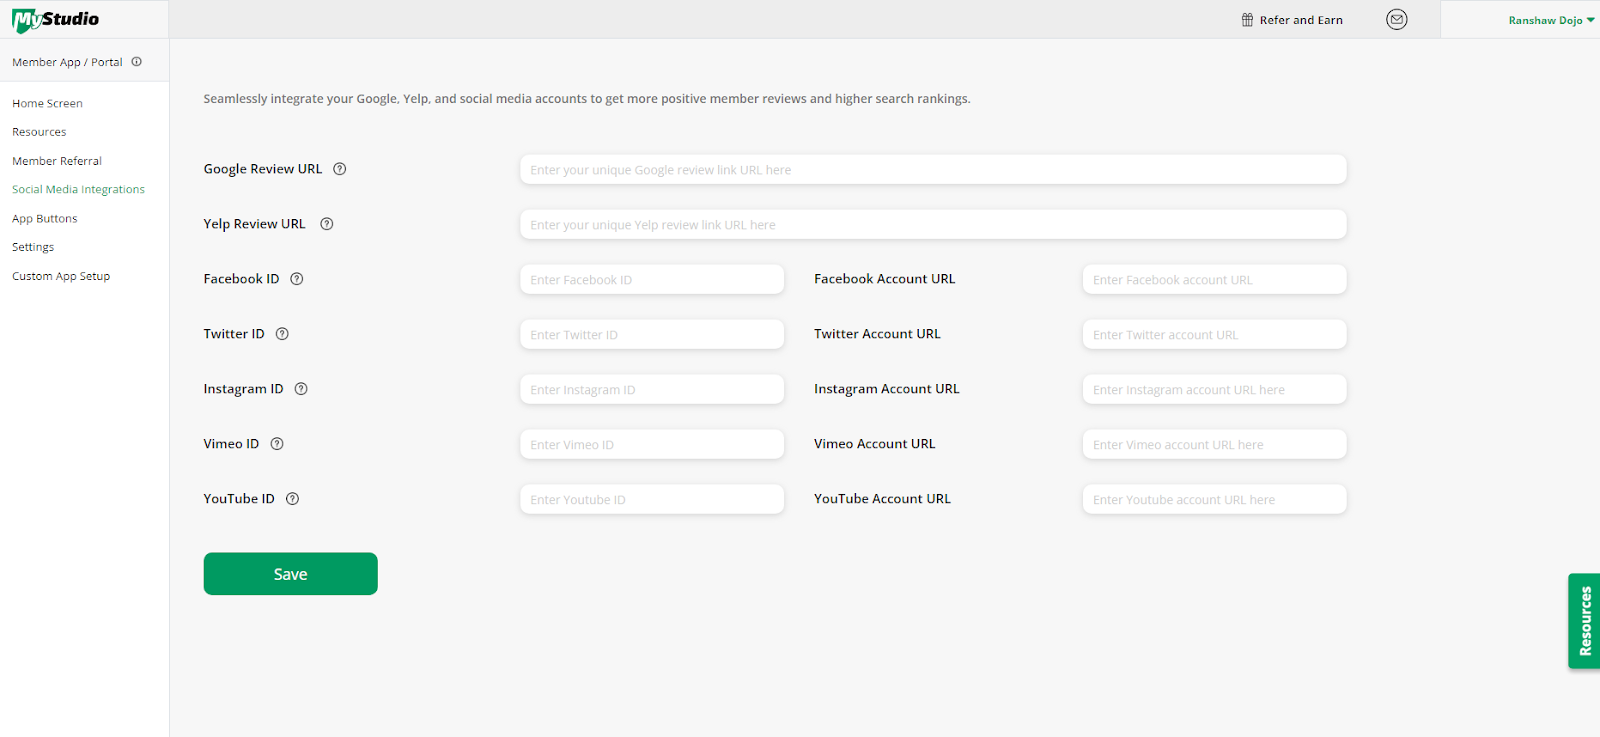
In sales > member app / portal > social media integrations, you can provide us with URLs and IDs for your various social media accounts. These will display in the member app by clicking on the three lines and going to the “find us” section.
App buttons
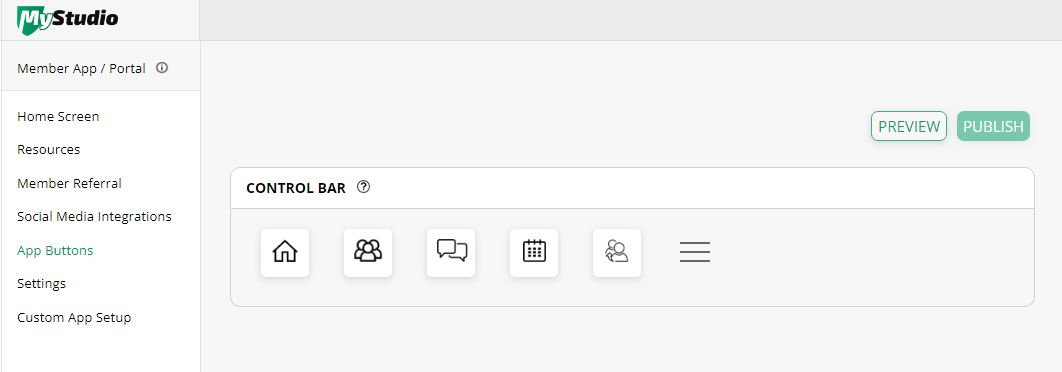
At the top of the member web app and at the bottom of the mobile app, there are app icons for easy offering access.
If you are on our growth or scale plans, you can determine which icons appear here and in what order by going to sales > member app / portal > app buttons. When customers log into the app, they will be brought to whichever icon is in the first position. So if you have turned on your home screen, this should be the first button.
To edit the buttons, click on the icons and choose the item you would like to display instead.
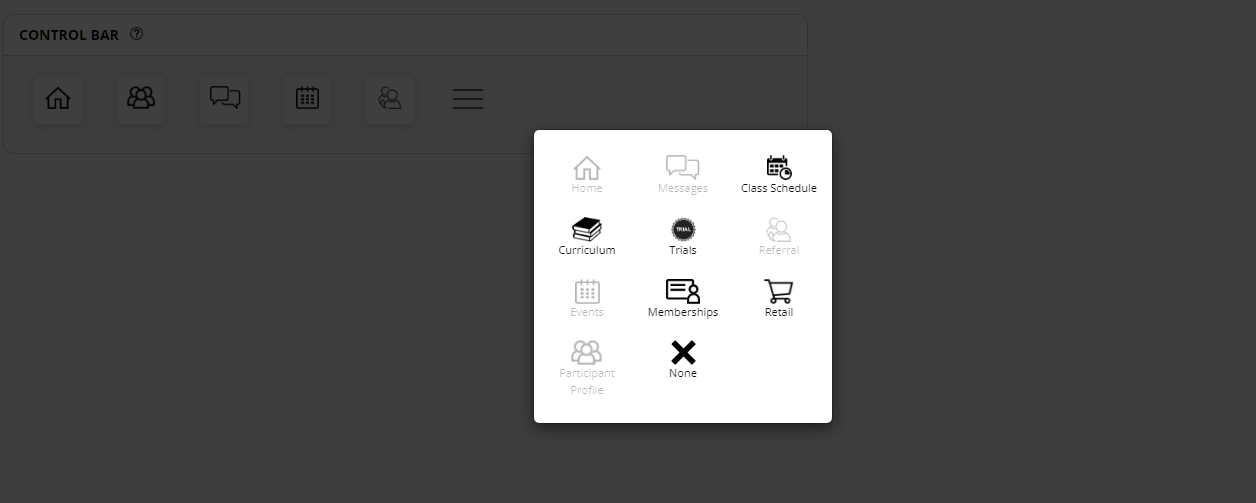
If you would like to reorder icons, remove them from the list first, then re-add them to the spot you would like them.
Settings
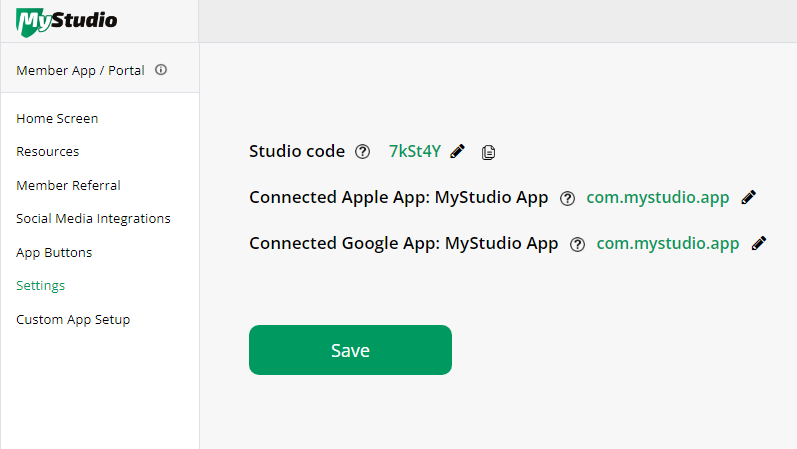
In the sales > member app / portal > settings section, you can edit your studio code, which is used by customers to log in to the correct studio in the app.
You can also edit the connected Apple or Google app if you have the custom app add-on and setup.