Table of contents
Permissions and accessibility
Staff access:
- Admin
- Full access
- Manager
- Full access
- Staff
- No access
MyStudio plan restrictions:
- None
Overview
- Our system only allows refunds for transactions that occurred no more than 180 days in the past.
- Manual credits, which can be applied towards future program or event payments, act as coupons or in-store credit and cannot be refunded.
- Our system allows both full and partial refunds. If you do a partial refund, you can do more refunds on that transaction after.
- Refund minimum is $1
Programs
Program refunds take place from within the program internal registration page. You can get to this page from two places:
- Payments > payment history > click on the buyer name connected to the registration
- All customers > program participants > click on the participant name to access the internal registration page > payments
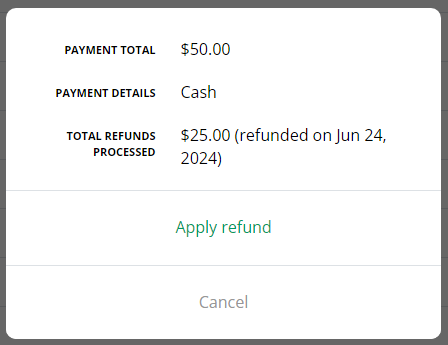
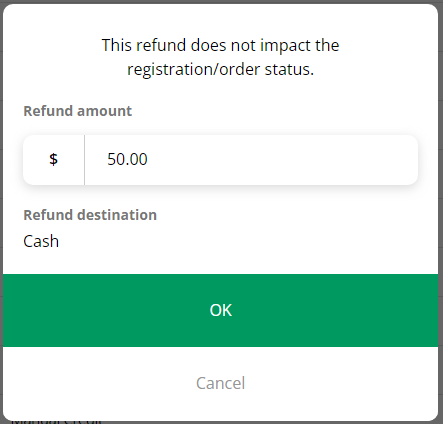
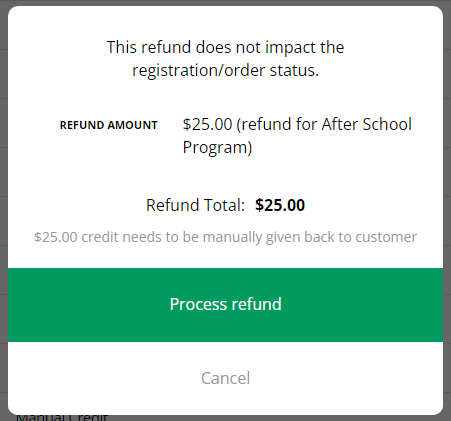
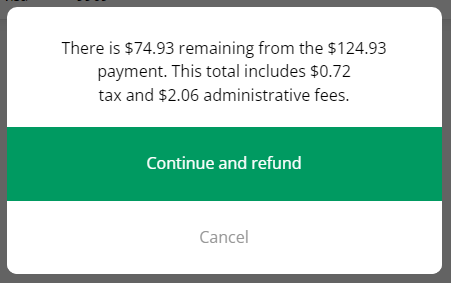
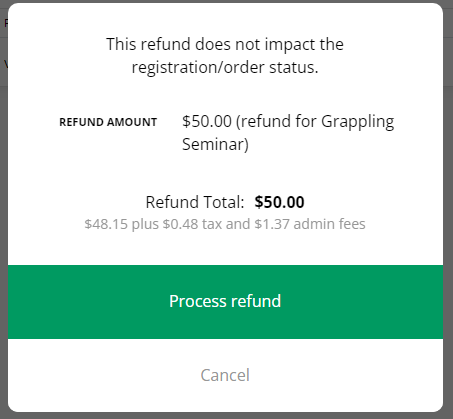
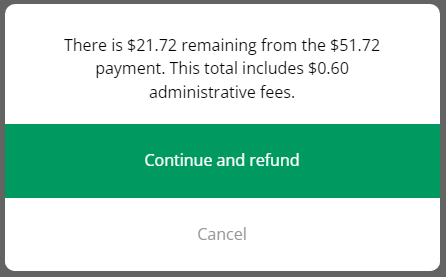
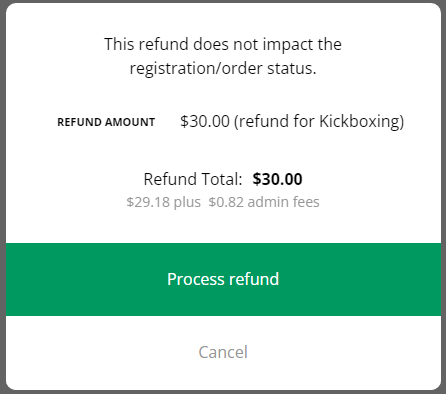
Drop down the payment history section and click on the payment you would like to refund. Then click “apply refund.” Refunds will not affect the program status and will go back to the payment method used. If the payment was made with cash or check, then you’ll need to offer the customer cash or check refund. Under “refund amount,” keep the full amount or enter a partial amount to refund.
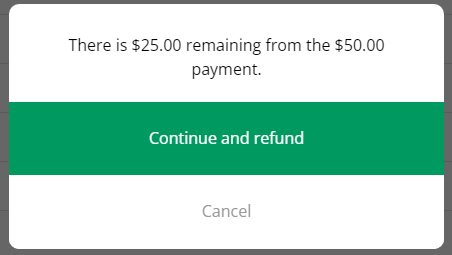
If you enter a partial amount, the system will show you the remaining amount of the original payment.
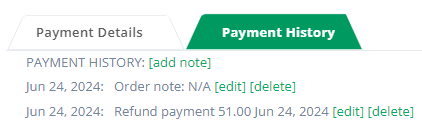
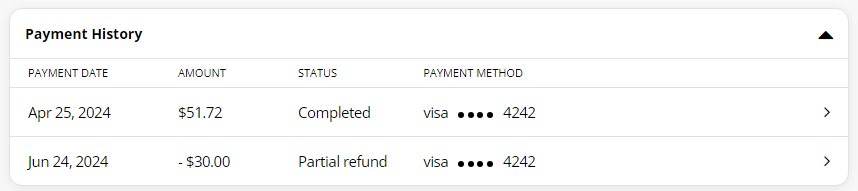
Once the refund is processed, you will see the refund in the payment history list. If it was a partial refund, you can continue to issue refunds from the same transaction.

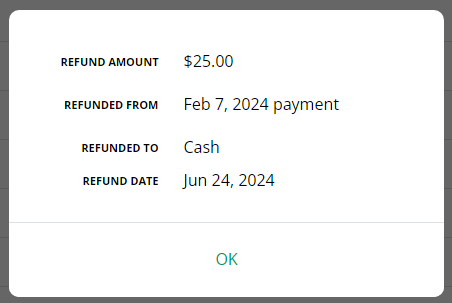
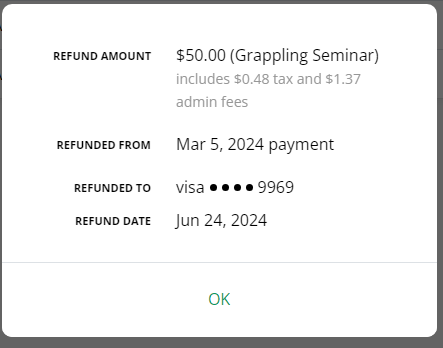
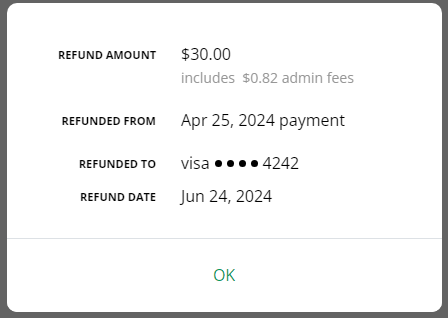
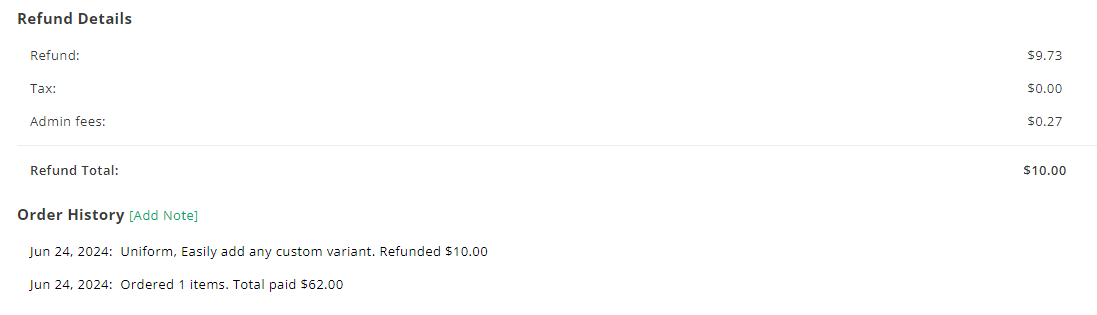
Clicking on the refund listing will show the refund amount, the payment it was refunded from, the payment method, and when the refund was issued.
Events
Event refunds take place from within the event internal registration page. You can get to this page from three places:
- Payments > payment history > click on the buyer name connected to the registration
- All customers > event participants > click on the participant name to access the internal registration page > payments
- All customers > event participants > click the participants name to access the internal registration page > modify to cancel.
Apply refund
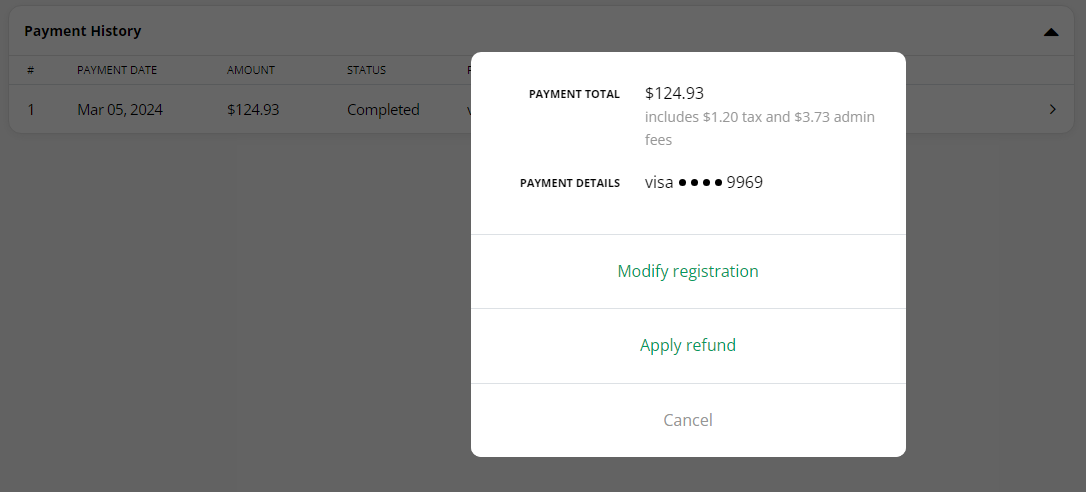
Drop down the payment history section and click on the payment you would like to refund. Then click “apply refund.” Refunds will not affect the event status and will go back to the payment method used. If the payment was made with cash or check, then you’ll need to offer the customer cash or check refund. Under “refund amount,” keep the full amount or enter a partial amount to refund. Because events can have specific payment plans and multiple event dates, you will need to select which registration the refund applies to. This is particularly important for multi-date event registrations.
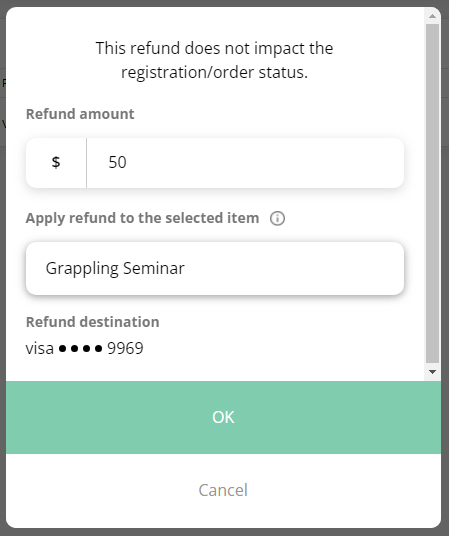
If you enter a partial amount, the system will show you the remaining amount of the original payment.
Once the refund is processed, you will see the refund in the payment history list. If it was a partial refund, you can continue to issue refunds from the same transaction.

Clicking on the refund listing will show the refund amount, the payment it was refunded from, the payment method, and when the refund was issued.
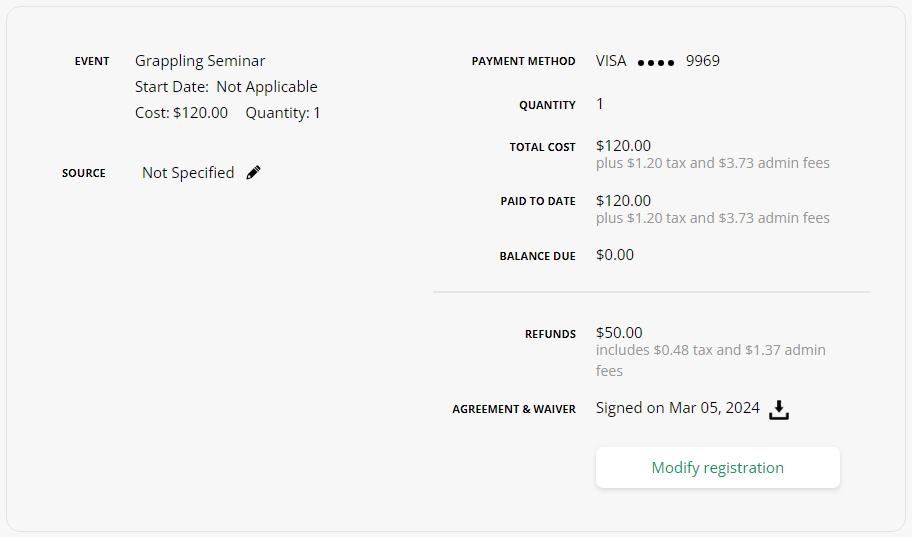
You will also see the refund on the event info page.
Modify order
Canceling events and the effect on the payment plans can get a little tricky with events since we offer a lot of payment plan combinations during the creation phase. To cancel an event, click “modify registration” from the internal registration page and change the quantity of the event you want to cancel to 0. You will then come across one of four scenarios:
1. Process cancellation
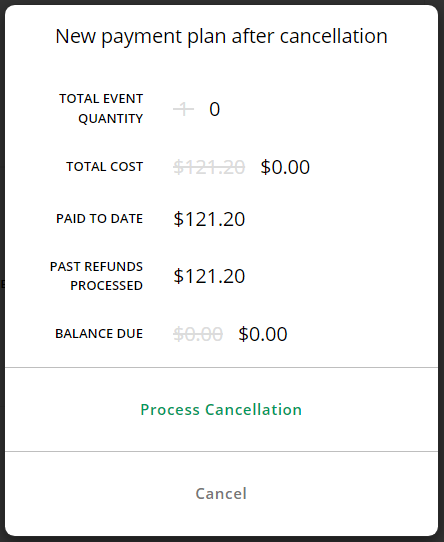
If the event didn’t cost anything or if it was already fully refunded prior to canceling, you will just see the option to process the cancellation. Since no payments are affected, the cancellation will just occur.
2. Refund or no refund
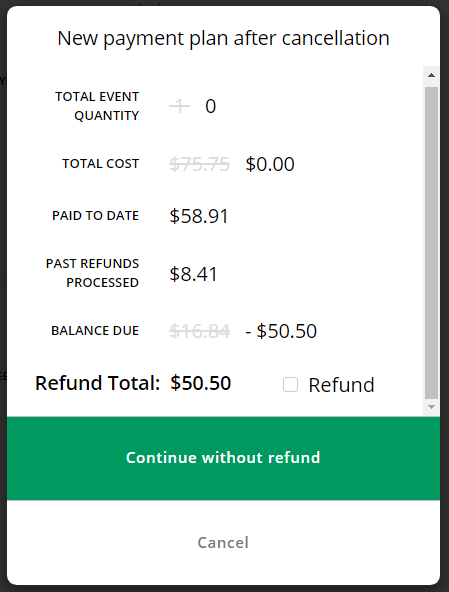
If the event was paid in full and you are canceling some or all events OR some payments have been made towards the event and you are canceling all events, you will be shown the breakdown of changes towards the event quantity, total cost, paid to date, past refunds processed, and balance due. You will then be asked if you would like to refund what has already been paid or not by checking the refund box.
This will refund and cancel as selected.
3. Payment plans
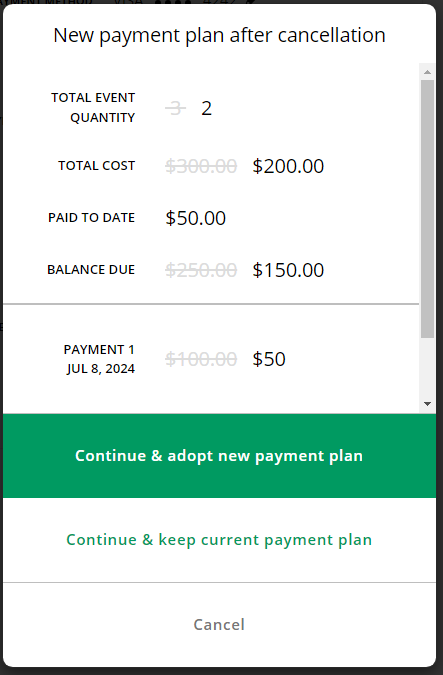
If the event was on a payment plan and you are not canceling all events, the system will show you a breakdown of the changes in quantity, total cost, paid to date, balance due, and show the potential new payment plan. You will be given two options:
- Continue & adopt new payment plan: this will cancel the chosen event date, and the payment plan will be adjusted as if the customer had only registered for the non-canceled options.
- Continue & keep current payment plan: this will cancel the events as chosen, but the customer will still be responsible for the full amount as though they hadn’t canceled.
Note: deposits go towards the first payment. If you had event dates that charged on the event dates and the transaction had a deposit, but you cancel the first date, the deposit will be taken from the next date.
4. Disqualifying payment plans
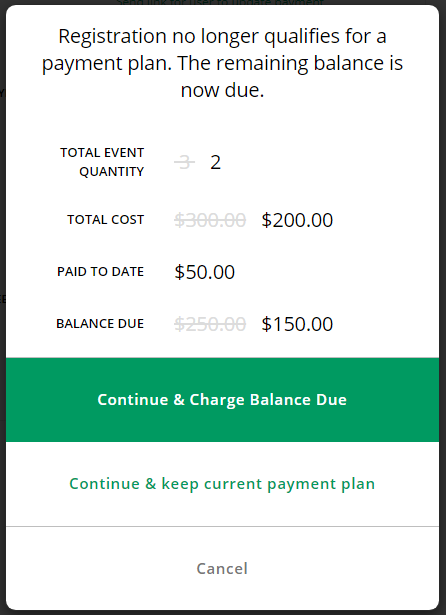
You can choose whether payment plans can only be options if the customer purchases a certain amount or quantity. If a customer then cancels enough event dates to disqualify them from the payment plan, you will be given two options:
- Continue & charge balance due: this will cancel the events as chosen and then charge the customer for the remaining balance. If there was a deposit and only one date is remaining, the deposit will be taken from this balance due.
- Continue & keep current payment plan: this will cancel the events as chosen, but the customer will still be responsible for the full amount as though they hadn’t canceled.
In any of these four scenarios, if you choose not to refund or aren’t given the option to refund, you can always refund after the cancellation from the payment history section.
Trials
Trial refunds take place from within the trial internal registration page. You can get to this page from two places:
- Payments > payment history > click on the buyer name connected to the registration
- All customers > trial participants > click on the participant name to access the internal registration page > payments
Drop down the payment history section and click on the payment you would like to refund. Then click “apply refund.” Refunds will not affect the trial status and will go back to the payment method used. If the payment was made with cash or check, then you’ll need to offer the customer cash or check refund. Under “refund amount,” keep the full amount or enter a partial amount to refund.
If you enter a partial amount, the system will show you the remaining amount of the original payment.
Once the refund is processed, you will see the refund in the payment history list. If it was a partial refund, you can continue to issue refunds from the same transaction.
Clicking on the refund listing will show the refund amount, the payment it was refunded from, the payment method, and when the refund was issued.
Retail
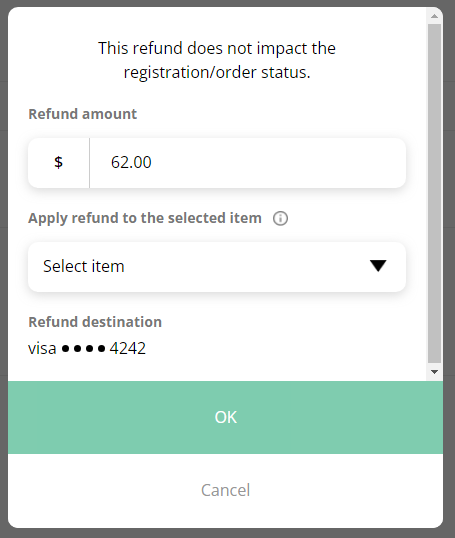
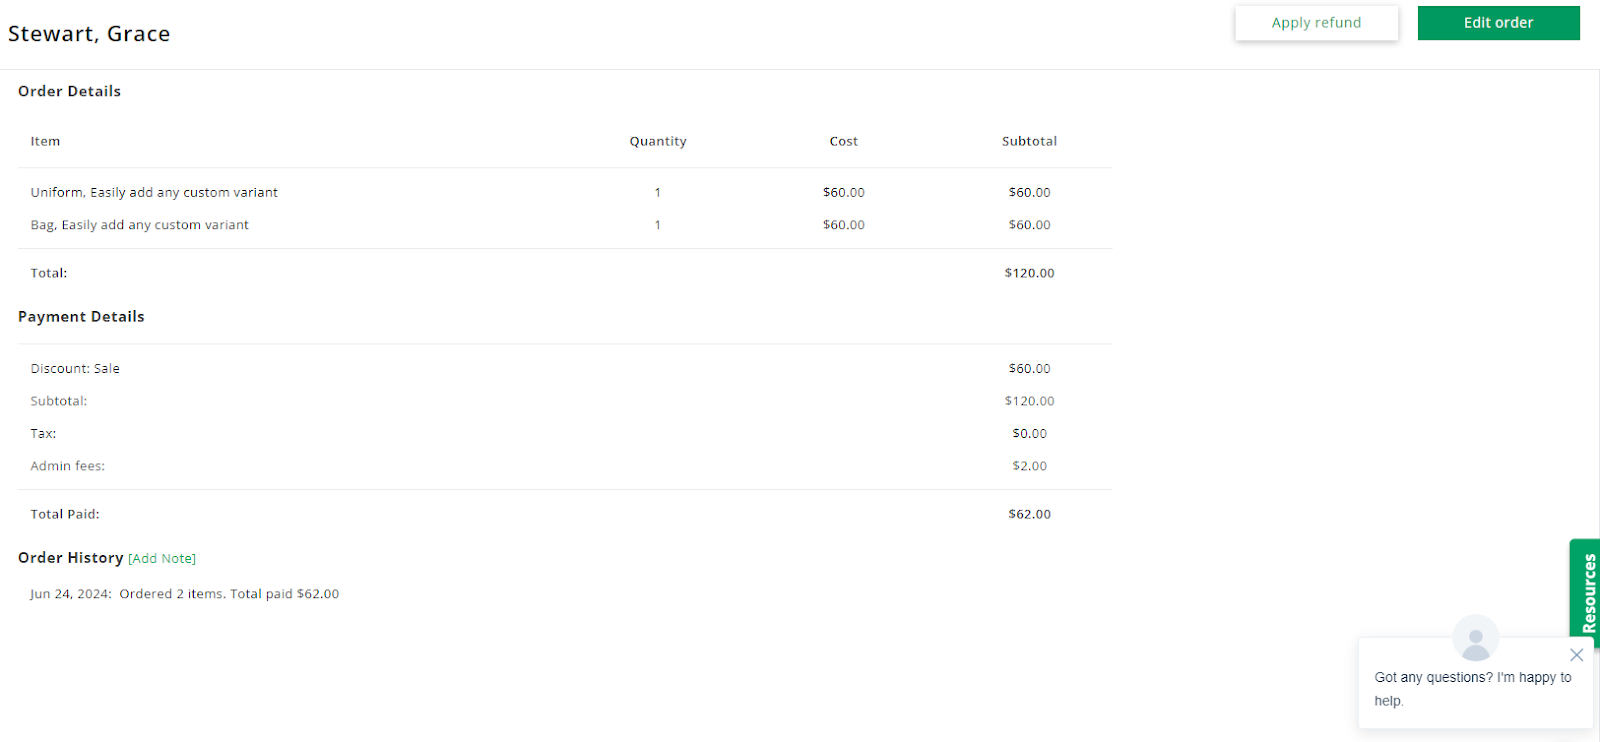
Retail refunds take place from within the retail orders internal page. You can get to this page from three places:
- Payments > payment history > click on the buyer name connected to the transaction
- Operations > retail orders > click on the transaction > refund
- Operations > retail orders > click on the transaction > edit order and cancel
Apply refund
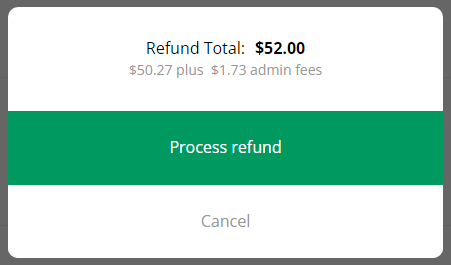
From the order internal page, click “apply refund.” Because you can order more than one retail item at a time, you will need to apply the refund amount to one or multiple items. You can leave the full amount or enter a partial amount. Refunds will go to the original payment method.
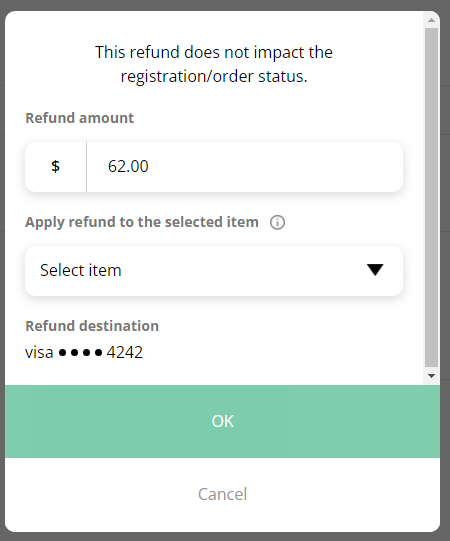
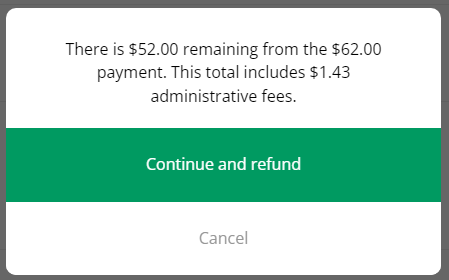
If you enter a partial refund amount, the system will show you the remaining amount of the original payment.

Once the refund is processed, you will see the refund in the order history list and the refund will be displayed in its own section. If it was a partial refund, you can continue to issue refunds from the same transaction.
Edit order
If canceling a retail order, click “edit order” and change the quantity of the canceled item to 0.
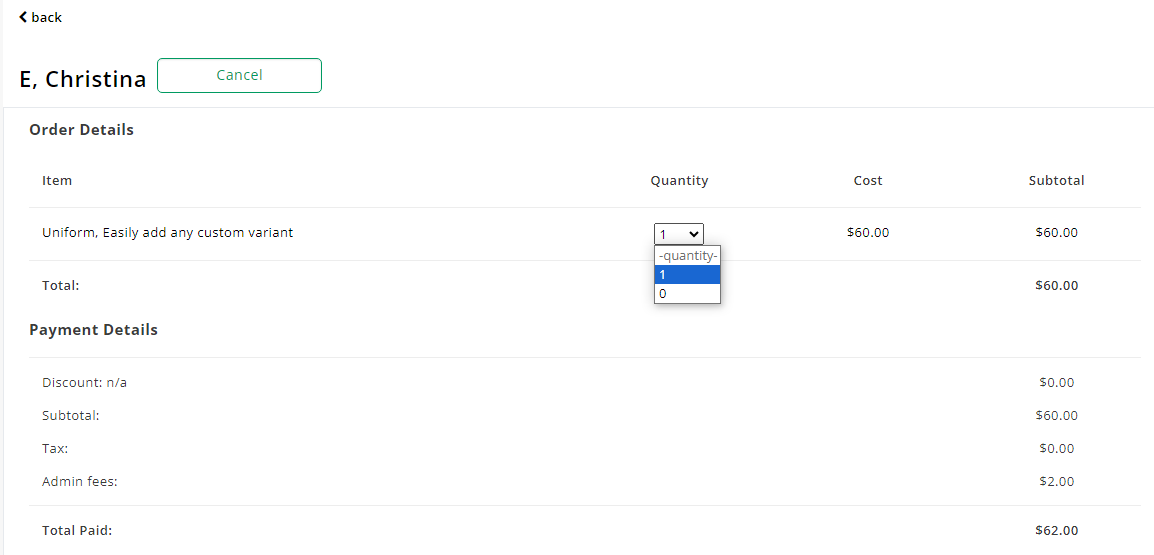
Select “process change.” Canceling a retail order will automatically refund the full amount. If a partial refund has already been issued, then the rest of the amount will be refunded.
Disqualifying from discounts
You can create in-depth discount codes for retail that are only activated after a minimum amount or quantity. If a transaction using this type of discount code is canceled to where it disqualifies the discount code, then this cancellation may require the customer to be charged for the remaining amount.
Example:
Setup: The discount code gives a 75% discount if the customer orders at least 2 items.
A customer orders 2 items, then cancels one item. When this change is processed, you will be asked to charge the customer the remaining amount.
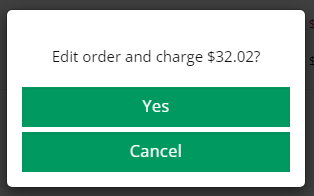
This amount can be refunded later.
Class / Appointments
Class / appointment refunds take place from within either the class orders internal page or the primary or participant profile. You can get to these refunds from four places:
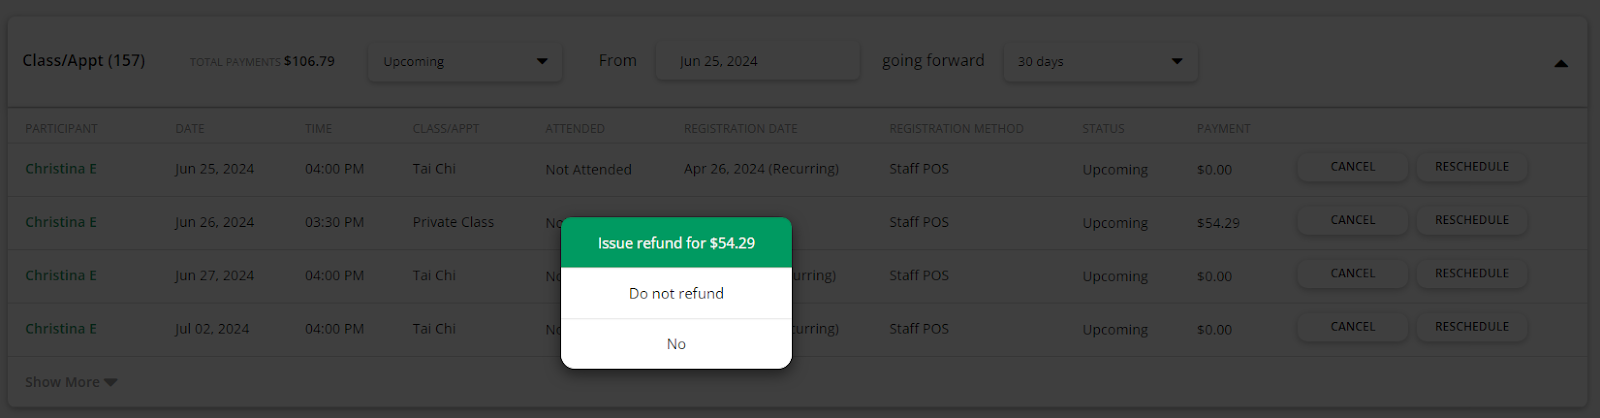
1. Operations > class / appointment calendar > click into a class time > click the buyer name > delete registration > issue refund. You can also choose to not issue a refund.
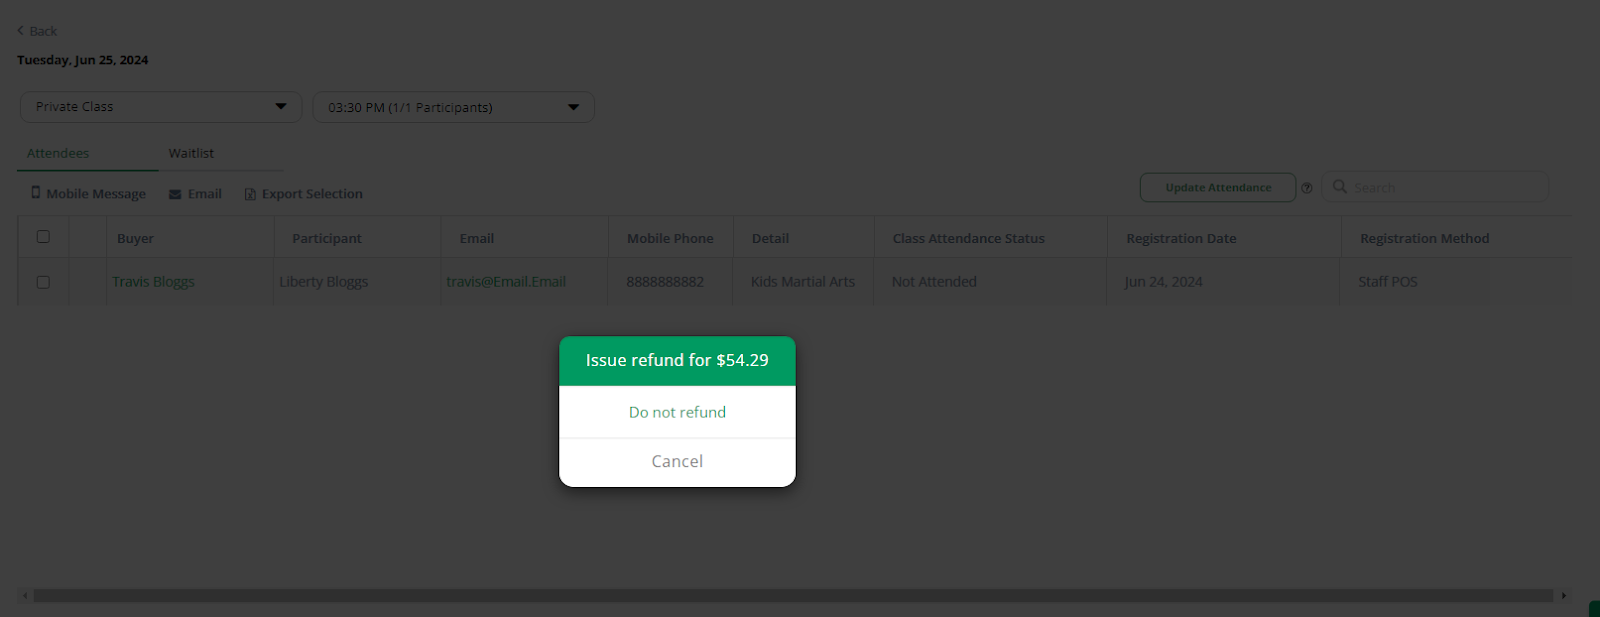
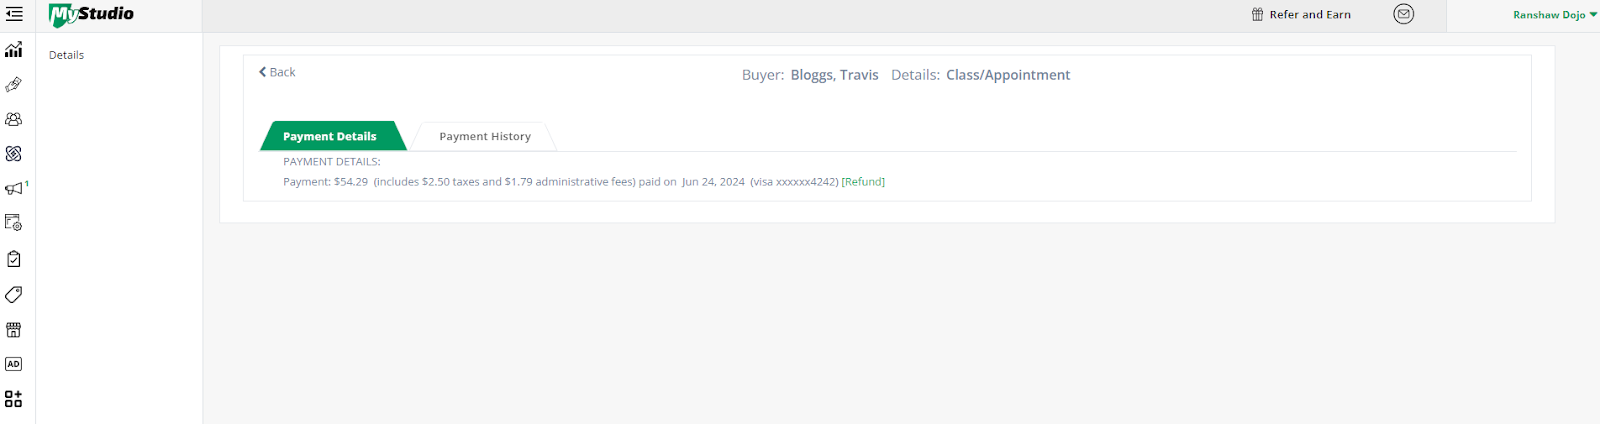
Click “refund” next to the transaction. You can leave the full amount or enter a partial amount. Refunds will go to the original payment method. Once refunded, the refund will show under the original transaction. If you issued a partial refund, you can apply additional refunds on the same transaction afterward.

In the payment history tab, you will also see the refunded listing.

Miscellaneous

Miscellaneous refunds take place from within the miscellaneous transaction page. You can get to this page from payments > payment history > click the buyer name on the miscellaneous charge.
Click “refund” next to the transaction. Miscellaneous transactions are the only ones that cannot do partial refunds. Once refunded, the refund will show under the original transaction.

In the payment history tab, you will also see the refunded listing. Click “edit” to edit the refund note or “delete” to delete the refund note. Editing or deleting will not affect the refund itself, just the note.