
Overview
If you utilize staff members in your system, the staff schedule section in operations allows you to set specified time schedules, easily tracking time sheets for your staff.
Table of contents
Permissions and accessibility
Staff Access:
- Admin
- Full access
- Manager
- Full access
- Staff
- No access
MyStudio Plan Restrictions:
- How many staff can be added to the scheduling section is dependent on how many staff are allowed in my account > users and permissions.
- Starter: 0
- Growth: 10
- Scale: 50
Specifications
Settings

In order to set up staff scheduling, you will first go to operations > staff schedule > settings. Click “add” and set up different roles that your staff take, such as manager, and color coordinate the roles for a more visual view of the schedule you will set up.
Staff information

Once you complete adding roles, go to the staff information section. The staff members that are listed in my account > users and permissions will auto-populate here with a randomly generated PIN number for clocking in and out.
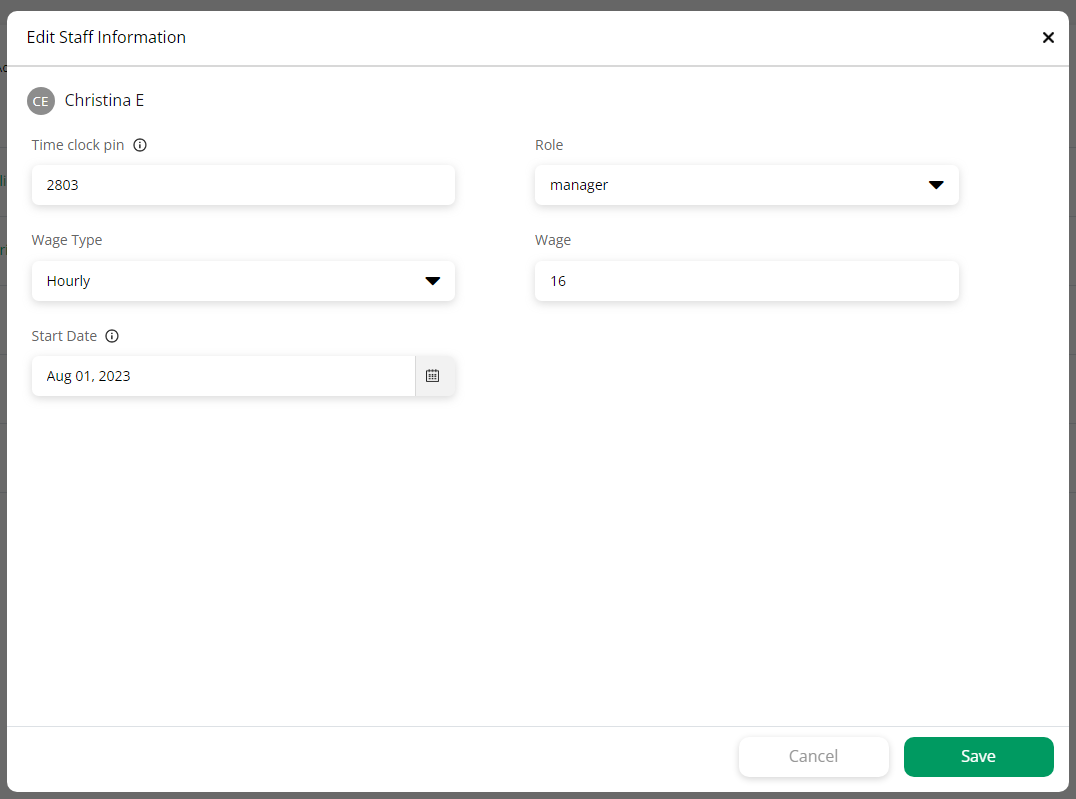
Click on the name of the staff member and enter the following information:
- Time clock pin: edit the clock in/out pin if desired.
- Role: select the appropriate role that you set up in settings.
- Wage type: select whether the staff member receives annual or hourly pay
- Wage: enter the dollar amount of their wage in conjunction with the wage type.
- Start date: select the date the staff member was hired.
Be sure to add this information for all staff members. You can also export this list into a CSV file by clicking “export” above the list. If you click “add staff,” you will be prompted to redirect to users and permissions.
Schedule
Once you’ve completed adding staff information, go to the schedule section in order to assign the staff member to a work schedule. If you don’t add the staff information, you will not see the staff member listed in this section and won’t be able to add a schedule for them.
You can select a specific date from the calendar selection to schedule a future week’s schedule.
To add a schedule for a staff member, you can click the drop down arrow next to the staff member’s name to add an ongoing schedule or tap on the date box in the employee's row to create individual day’s schedules.
Note: If a staff member already has some shifts scheduled, the drop down next to their name will say “edit schedule” instead of “add schedule.”

Ongoing schedule: when creating an ongoing schedule, click on the drop down arrow next to the staff member’s name > add/edit schedule and fill out the following:
- On-going from the drop down: choosing this from the first drop down will set an ongoing schedule for the staff member starting from a specified date.
- Custom from the drop down: choosing this from the first drop down will set an ongoing schedule for a specified date range. This type of schedule can be duplicated for easy editing and additional schedules.
- Days of the week: select which days of the week the staff member is scheduled.
- Time scheduled: for each day of the week selected, you will need to enter the time scheduled.
- Additional time scheduled: if a staff member is scheduled for two different time frames in a day, press the plus button to add an additional time frame.
- Add a break: if your staff gets unpaid breaks during their shift, click “add break” to schedule a break time that is not accounted for in their payroll.
If you need to add additional ongoing schedules, click “add new.” You can also delete a schedule at any time by clicking the trash can next to the schedule.
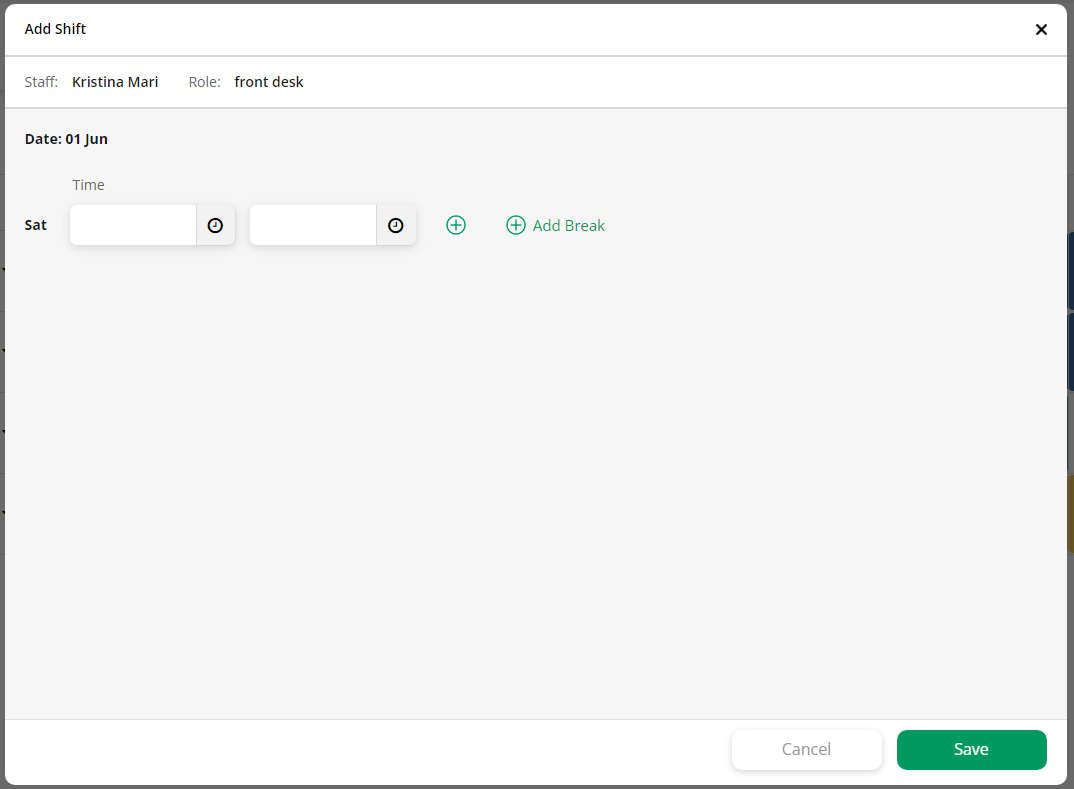
Individual day schedule: when creating a schedule for an individual day, click on the date box in the employee’s row and fill out the following:
- Time scheduled: enter the time scheduled for that work day.
- Additional time scheduled: if a staff member is scheduled for two different time frames in a day, press the plus button to add an additional time frame.
- Add a break: if your staff gets unpaid breaks during their shift, click “add break” to schedule a break time that is not accounted for in their payroll.
If you need to edit an ongoing schedule, click the drop down next to the staff member’s name and click “edit schedule.”
If you need to edit or delete a specific day’s shift, tap on the shift and select the trash can to delete or the pencil to edit.
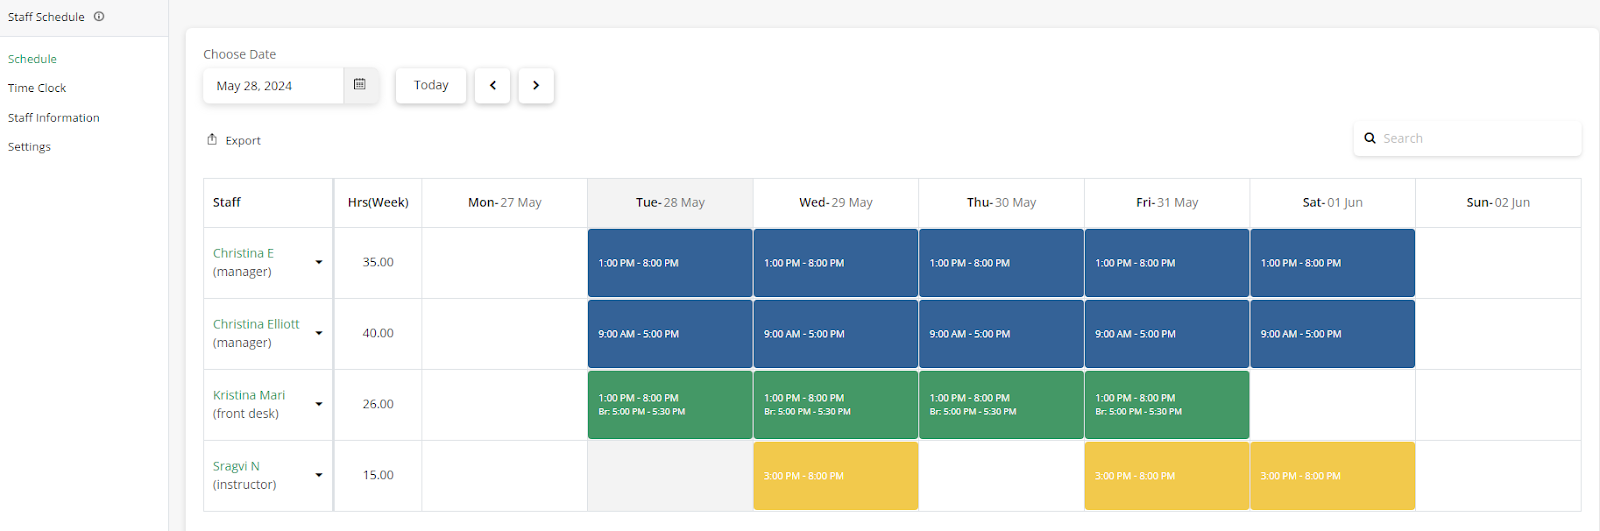
Once you create a schedule for a staff member, you will see a total scheduled hours calculation in the Hrs(Week) column. This is based on a Monday - Sunday weekly schedule. You can also get a quick glance of today’s schedule with the highlighted column.
You can also export this schedule to a CSV file to easily forward to your staff, or search for a specific staff member to see only their schedule for the week.
Time clock
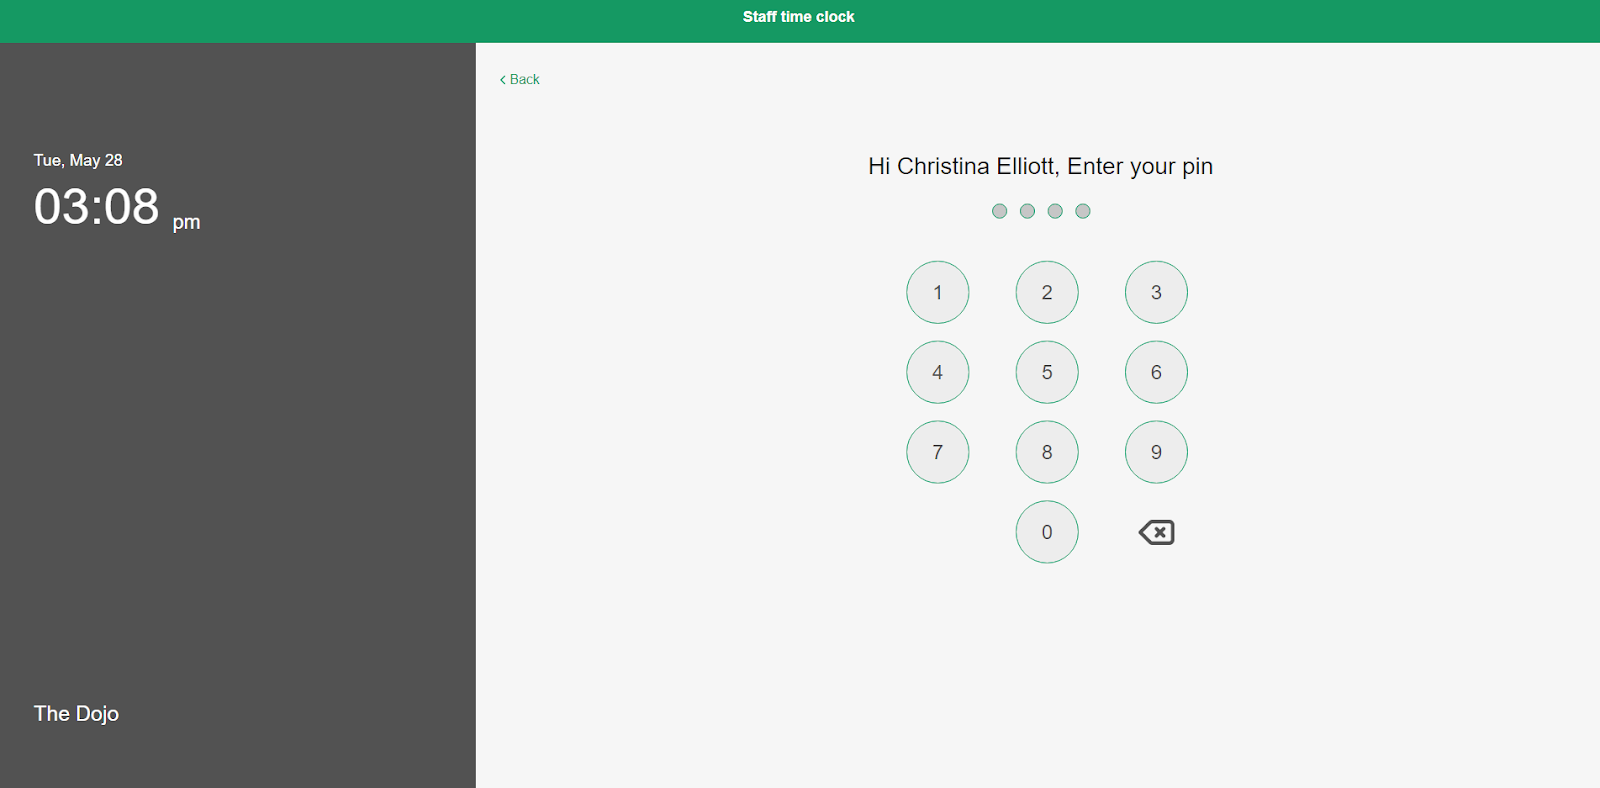
Launch the clock in/out kiosk from time clock > launch clock in kiosk mode. When launched, the kiosk will display a list of your staff. When an employee is ready to clock in, they will select their name, enter their pin, and click “clock in.” When they are ready to clock out, they will click their name again, enter their pin, and click “clock out.” The system will only allow the following clock in/clock out time frames:
- Early clock in: staff can clock in up to 30 minutes before the start of their scheduled shift time. The system will automatically change this on their timesheet to their scheduled shift start time.
- Late clock in: staff can clock in up to right before their scheduled shift end time. The system will mark this as "x minutes tardy" on their timesheet.
- Early clock out: staff can can clock out any time after they have clocked in. Doing so will show a left "x minutes early" status in their timesheet.
- Late clock out: staff can clock out up to 60 minutes after the end of their scheduled shift time. The system will automatically change this on their timesheet to their scheduled shift end time.
Note: Since different countries and states have different overtime pay requirements, our system does not calculate overtime. If you would like to keep track of this, you will need to do so manually by editing the clock in or clock out time and downloading a CSV.
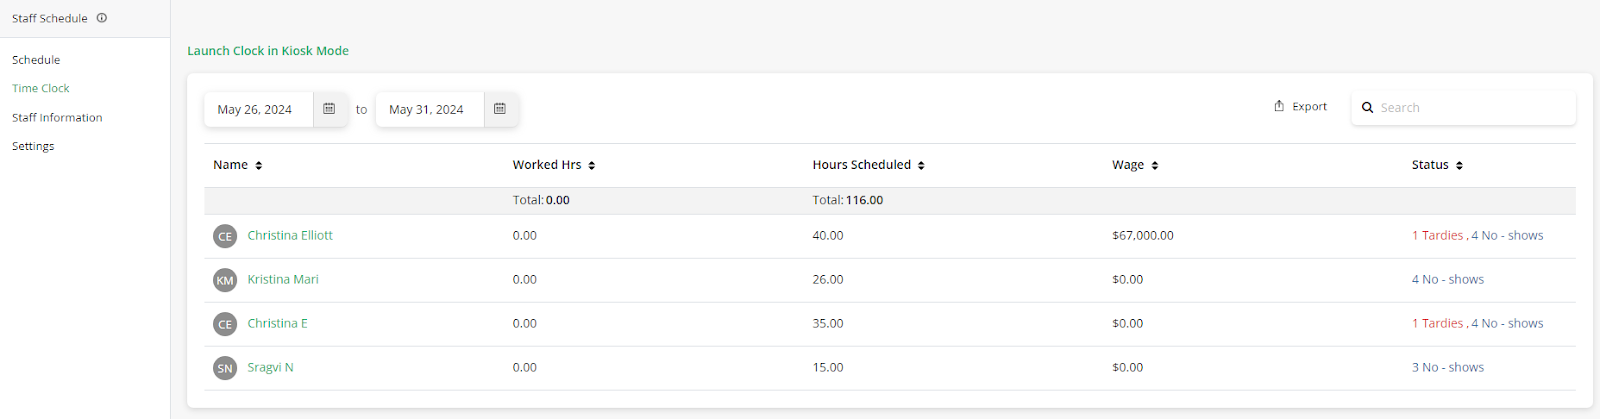
Time sheets are also displayed in the time clock section. After selecting the specified work week from the calendar date range selections, you will see the following table information:
- Name: click on a staff member’s name to see their specific time sheets for a specified week.
- Worked hours: this is the total amount of hours worked per week or day according to their clock in/out selections.
- Hours scheduled: this is the total amount of hours the staff member was scheduled to work per week or day.
- Wage: this is the total wage amount earned per week.
- Status: this lists the status of the scheduled shift. This can be the following:
- No show: the amount of times per week the staff member has not clocked in yet or did not show up. Click on the employee’s name to see each shift.
- Tardy: the number of times per week the staff member was late to their shift. Click on the employee’s name to see how many minutes they were late to each shift.
- No status: the staff member has no no shows or tardies that week.
If you need to make adjustments to a time card, click on an employee’s name and select “edit time.” You will then be able to adjust both the clock in and clock out times for each scheduled shift. You can also export these shift details to a CSV file.
FAQ
- My staff aren’t listed in the staff information section.
- In order to have staff other than yourself listed in the staff information section, you need to have staff listed in my account > users and permissions. They also need to have accepted the invite as a user. If your MyStudio plan allows less users than you have staff, you may want to consider upgrading your plan to fully utilize this functionality.
- My staff aren’t listed in the schedule section.
- In order to have staff listed in the schedule section, you need to fill out all information in the staff information section.