Trial automations allow you to send automatic communications to customers in your different trial offerings. This can include welcoming them, providing more information about the program they are interested in, etc.
Table of contents
Permissions and accessibility
Staff access:
- Admin
- Full access
- Manager
- No access
- Staff
- No access
MyStudio plan restrictions:
- How many automations you are able to create is based on your MyStudio plan
-
Starter: 0
-
Growth: 10
-
Scale: 20
-
- We have an automations add-on for $39 / month which gives you unlimited automation creation.
Creating automation
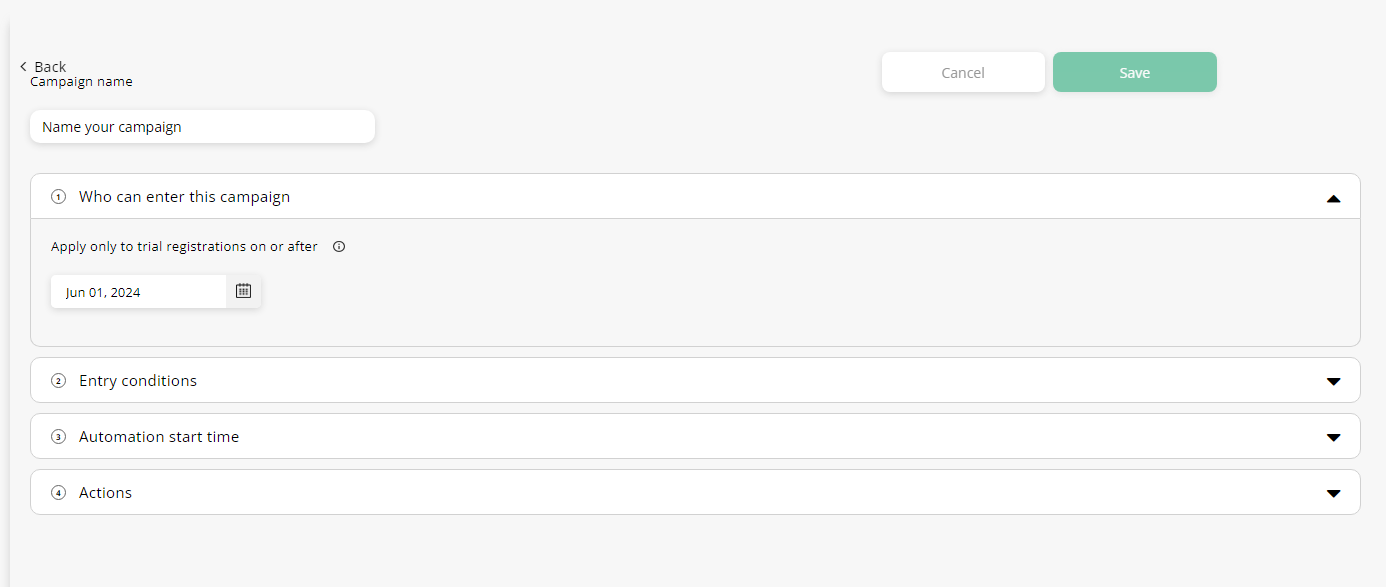
Create a trial automation by going to automations > trials > create new campaign. Name your automation and then go through the following steps:
1. Who can enter

The automation will only send to those who had a trial registration on or after the date selected.
2. Entry conditions

Choose the conditions that will trigger the automation. The subject of the trigger conditions includes:
- Trial status
- Trial program
- Trial start date
- Trial end date
- Trial last attendance
- Total attendance count
- Trial lead source
- Attendance within a specific time period
You can also add additional conditions to trigger the automation. If you do so, you will also need to choose whether it follows the “and” rule or the “or” rule.
And: both conditions need to be true in order for the automation to trigger.
- Example: trial status is active AND trial program is children’s martial arts trial.
- The participant would be required to be in the children’s martial arts trial and be active.
Or: either condition can be true in order for the automation to trigger.
- Example: trial program is after school program or trial program is children’s martial arts trial.
- The participant would need to be registered for either the after school program trial or the children's martial arts trial in order to receive the automation.
You can add as many additional conditions as you need, but keep in mind that the more complicated an automation, the less often it will trigger. Delete any unwanted conditions by clicking the x next to them.
3. Automation start time

Specify the time that the automation will send if it doesn’t send immediately.
4. Actions
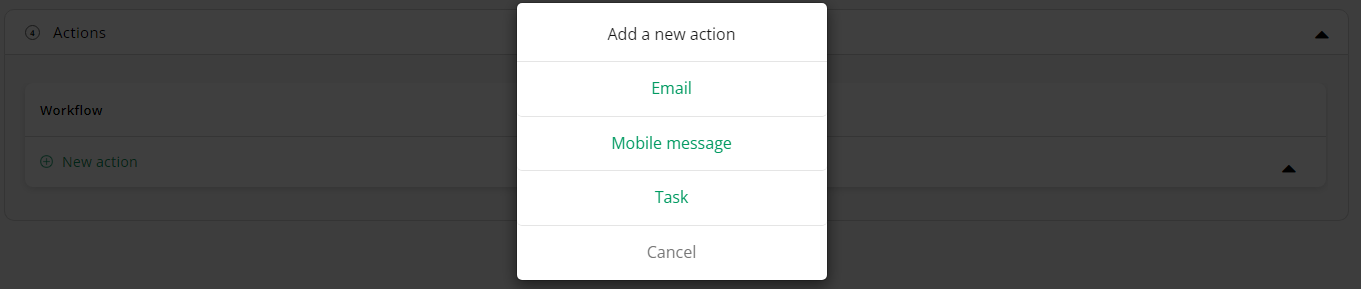
Add a new action for a workflow:
- Email:
- Choose an email template or create a new template. Then choose whether this first workflow will send immediately, at the specified time, or x number of days after the automation start time.
- You can view or edit the template by clicking “view / edit.”
- Mobile message:
- Choose a mobile message template or create a new template. You can view or edit the template by clicking “view / edit.”
- Choose whether it sends and SMS or in-app message
- Then choose whether this first workflow will send immediately, at the specified time, or x number of days after the automation start time.
- Task:
- Choose a task template or create a new template. You can view or edit the template by clicking “view / edit.”
- Assign the task to a specific staff member
- Then choose whether this first workflow will send immediately, at the specified time, or x number of days after the automation start time.
Note: If you select to activate the task at the specified time, but the requirements are met after the send time, the automation will trigger the following day.
You can create additional tasks to trigger at the same time for the same workflow by clicking “new action” in the same workflow card.
5. Exit conditions

Trials will automatically be removed from the automation workflow when they have completed all the steps. However, you will also need to set custom conditions for removing a trial from the campaign. Usually this would include conditions such as status changes. You will have all the options that you had above in the entry condition step.
Be sure to save your automation before clicking away! Our system will not prompt you to save and you will lose set up progress if you click away before saving.
Table and stats
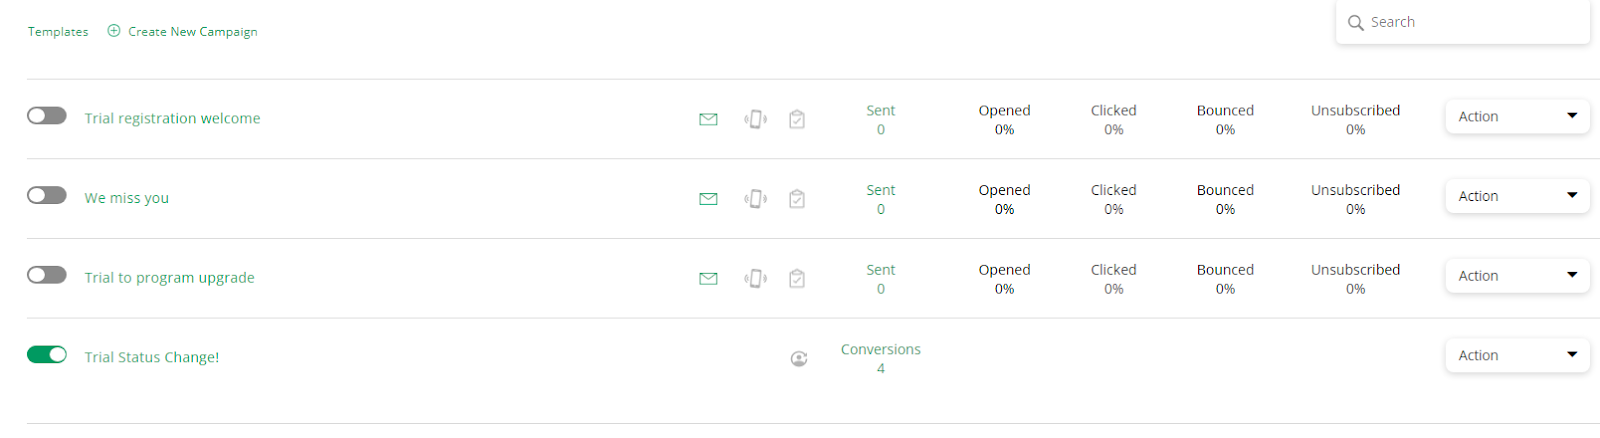
In automations > attendance, you will see your list of attendance automations. From this page you can do the following actions:
- Toggle the automation between active and inactive.
- Click on the title of the automation to make edits
- Click the email icon to see the statistics of sent, opened, clicked, bounced, and unsubscribed emails
- Click the mobile message icon to see the statistics of sent mobile messages
- Click the task icon to see the statistics of how many tasks were created
- Click the sent number to see a full recipients list
- Click the action drop down to do one of the following:
- Edit
- Duplicate
- Delete
When you click into the recipients list, you will see a table with the following information:

- Recipient (primary customer) name
- Participant name
- Type of person (primary customer or staff)
- Phone number
- Actions taken
- Next scheduled action
You can click the three dots to remove a recipient from the automation workflows.
IMPORTANT: If you remove someone from the automation, they will NOT be able to re-enter the automation.
Common scenarios
Registration welcome
If you would like to create an automation to welcome new trial registrants, you can use our “trial registration welcome” template! This template utilizes the following setup:
- Who: specify the date
- Entry: trial status is active
- Actions: an SMS or email and a task for staff to welcome the participant
- Exit: trial status is enrolled OR trial status is cancelled OR trial status is did not start
We miss you
If you would like to create an automation to encourage trials to attend, you can use our “we miss you” template! This template utilizes the following setup:
- Who: specify the date
- Entry: trial status is active AND attendance within a specific time period is exactly 0 in the last 7 days AND trial program is ____
- Actions: send an email and assign a task for staff to reach out
- Exit: Trial status is cancelled OR trial status is enrolled OR trial status is did not start
Trial status conversion
Automatically change your trial status to enrolled when trials register for memberships. To access this setup, you will need to go to the templates and choose “trial status change.”
For more information on this specific setup, check out our article here: Trial Status Automation.